Fine motor skills activities are an essential part of preschool, but what does that actually mean? Is fine motor just a buzzword? No, but you might not haven given it too much thought, because as adults, our fine motor skills are quite developed.
Fine motor skills refer to the coordination of small muscles in the hands, wrists, and fingers.
You are using your fine motor muscles when you hold a pencil to write, bead a necklace, cut with scissors, button your shirt, etc.
To accomplish essential everyday activities, children need to build their fine motor skills, especially as they enter kindergarten and are expected to write with a pencil. Weak muscle tone in the hands would lead to very wobbly and lightly written letters, and more importantly a child who feels like they are "not good" at writing.
The good news: developing these muscles is a natural part of play, especially in preschool and at home with things you already have around the house.
*As an Amazon affiliate, I may get a small commission for purchases made through links in this post.
When kids are 3-4 years old, fine motor skills they should be able to do include:
Once kids hit 5-6 years old, they'll be expected to reach these fine motor milestones:
Don't worry if your child doesn't reach a milestone at the exact age! Everyone is different. The more you practice fine motor skills with your child, the easier these milestones will be to reach, and it's never TOO late.
For a wider age range of fine motor skills milestones you can check out understood.org.
To help you find what you're looking for, I'm going to separate these fine motor activities into hand strengthening activities and grasp developing activities.
Hands strengthening activities work the wrist and hand while developing the skills needed for cutting with scissors, stacking blocks, squeezing glue, eating, opening containers, putting on shoes/socks, typing, and more.
Any activity where your child is using precise movements to scoop and transfer items increases coordination and strengthens the hands and wrists.
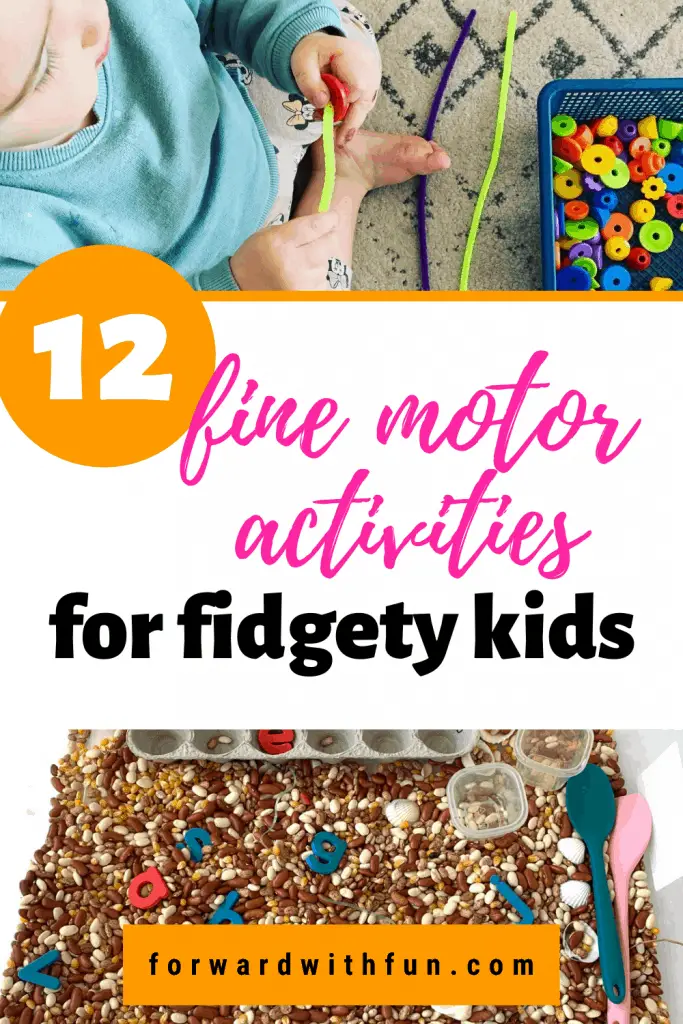
Sensory bins are great ways to explore using the senses while also using different fillers like rice, beans, cotton, chickpeas, water, and other materials perfect for scooping. Get our GIANT list of sensory bin fillers for FREE. To top it off, I give my kids spatulas, spoons, and other kitchen tools and bam, it's a hit.
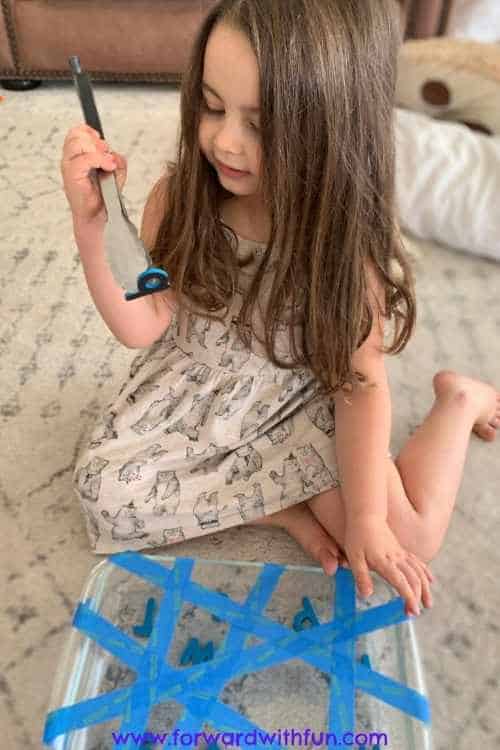
Create a "web" of blue tape around a baking dish before placing in items such as magnetic letters to be rescued. Give your child some kitchen tongs to rescue each letter as you call it out by name or sound. (Find 13 more fun alphabet activities like this HERE.)
Kids will use their hand muscles in an opening and closing motion similar to the motion needed to operate scissors. Since the tongs release on their own, kids only need to focus on the closing motion.
Do you have a one hole punch handy? It's an extremely enticing tool to children and it works a whole other group of hand muscles that tongs and scissors don't really get to. Kids can hole-punch anything that is thin enough. My favorite is leaves!
Here's an example from the OT Toolbox on how to make fine motor lanterns with a hole punch!
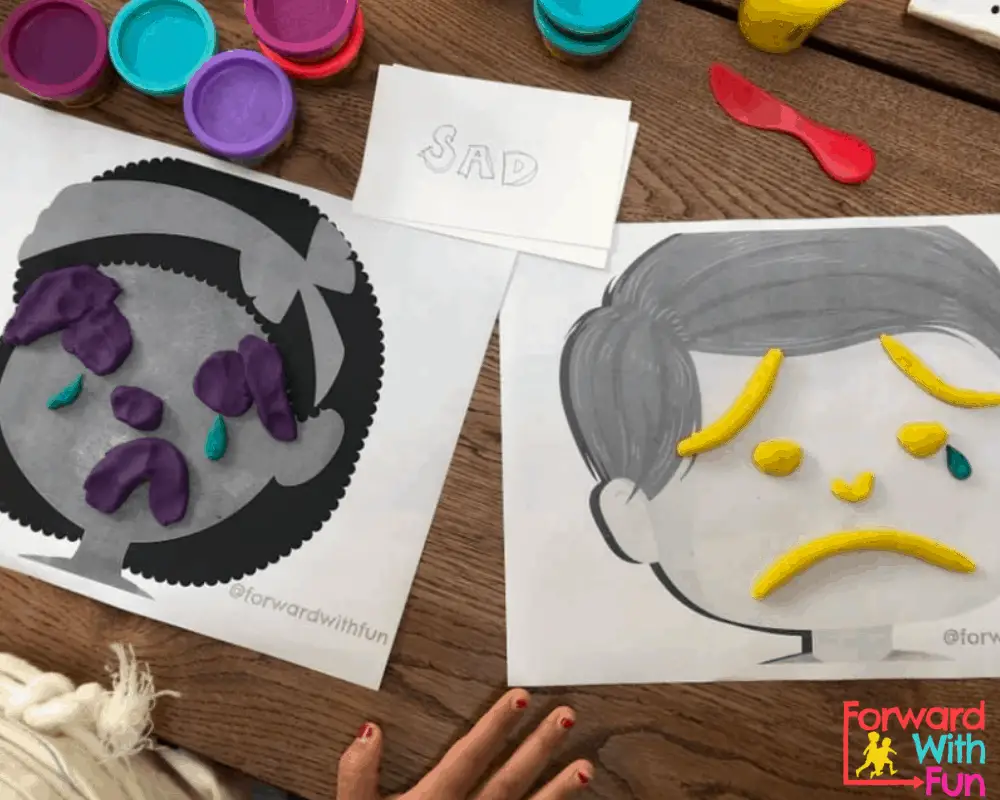
Develop muscles in the whole hand with Play-Doh shaping. Making towers, letters, faces, you name it, it's all going to help build those hand muscles.
Download these free blank faces and build fine motor skills while also developing your preschooler's understanding of feelings, with Feelings Faces.
Grab those sneakers and start practicing tying loops and knots to build coordination, motor planning, and fine motor skills. Have you heard of the Cheerio Method? It takes out that tricky bunny loop and replaces it with a cute as a button Cheerio. Check it out.
Tying shoes the Cheerio way is highly recommended by OT's (occupational therapists) because it doesn't require as much double handed dexterity as more "traditional" shoe tying methods.
These activities focus more on the development of muscles in the thumb, pointer, and middle finger used to grasp items. Kids will use need to master pincer and tripod grasps for writing, buttoning, zipping, drawing, and more.
Our very clever school OT (occupational therapist) made up this favorite game for our transitional kindergarten centers. Hide beads in the dough and have kids dig for treasure.
At home I make each little play-dough ball into an egg and the kids love "cracking" each egg and digging out the beads.
By picking out the beads kids are working on their pincer grasp and manipulating the play-dough builds all the muscles in the fingers, hands, and wrist making this activity a DOUBLE fine motor skills builder and it's perfect for preschoolers!

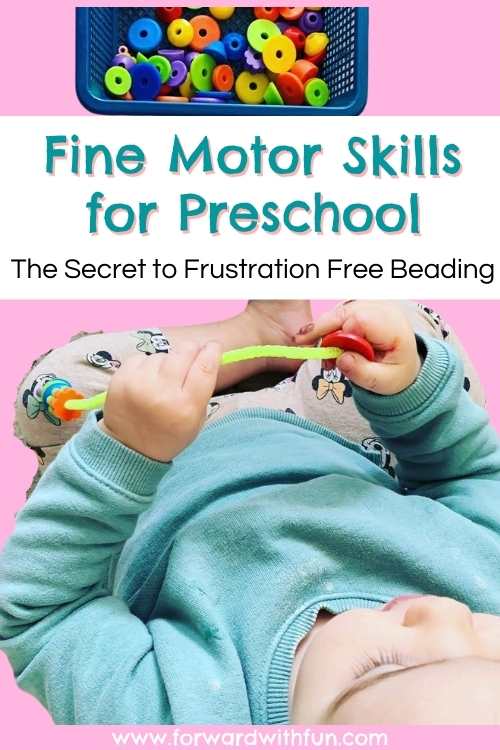
Often the beads that come in typical jewelry making kits have frustratingly tiny holes that can lead to meltdowns, especially for preschoolers who are only beginning to develop their fine motor skills.
To avoid that frustration, I recommend using large beads that will in turn, have a larger hole like these. For kids who have a bit more precision, pony beads come in all different colors are quite simple to lace.
My second secret for teaching your child how to bead without frustration is to use pipe cleaners instead of string. The point on the end is much easier to put through the hole, leading to more success.
Don't forget to wrap one end around the bead so that the beads don't slip off while your child is creating their masterpiece.
I love grabbing whatever stickers I can find in the Target dollar section, but hiding in their office section are one of my most favorite, inexpensive stickers: dot stickers!
Dot stickers are an excellent teaching tool, but they're also a way to enhance your child's fine motor abilities. Peeling the stickers off a page requires kids to pinch and pull the sticker, using tiny finger muscles.
If this is really taxing for your child, I recommend removing the sticker backing, usually the white outline around the stickers, to make it easier to peel them.
Want another dot sticker peeling activity? In this phone number activity, kids practice number recognition while also developing fine motor skills.
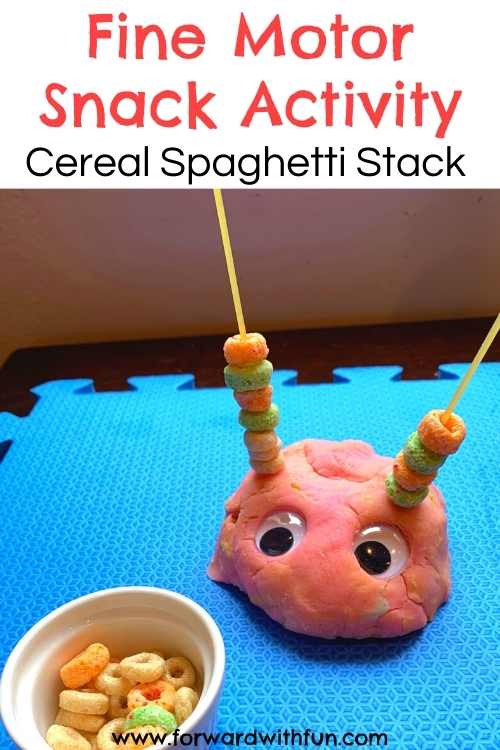
This one is just like it sounds and is a great fine motor skills activity to keep your preschooler busy while you cook dinner!
Grab a ball of playdoh and stick some dry spaghetti in, then use that pincer grasp to place cheerios or even penne pasta onto the spaghetti. Precision is key! Cute google eyes are optional but adorable.
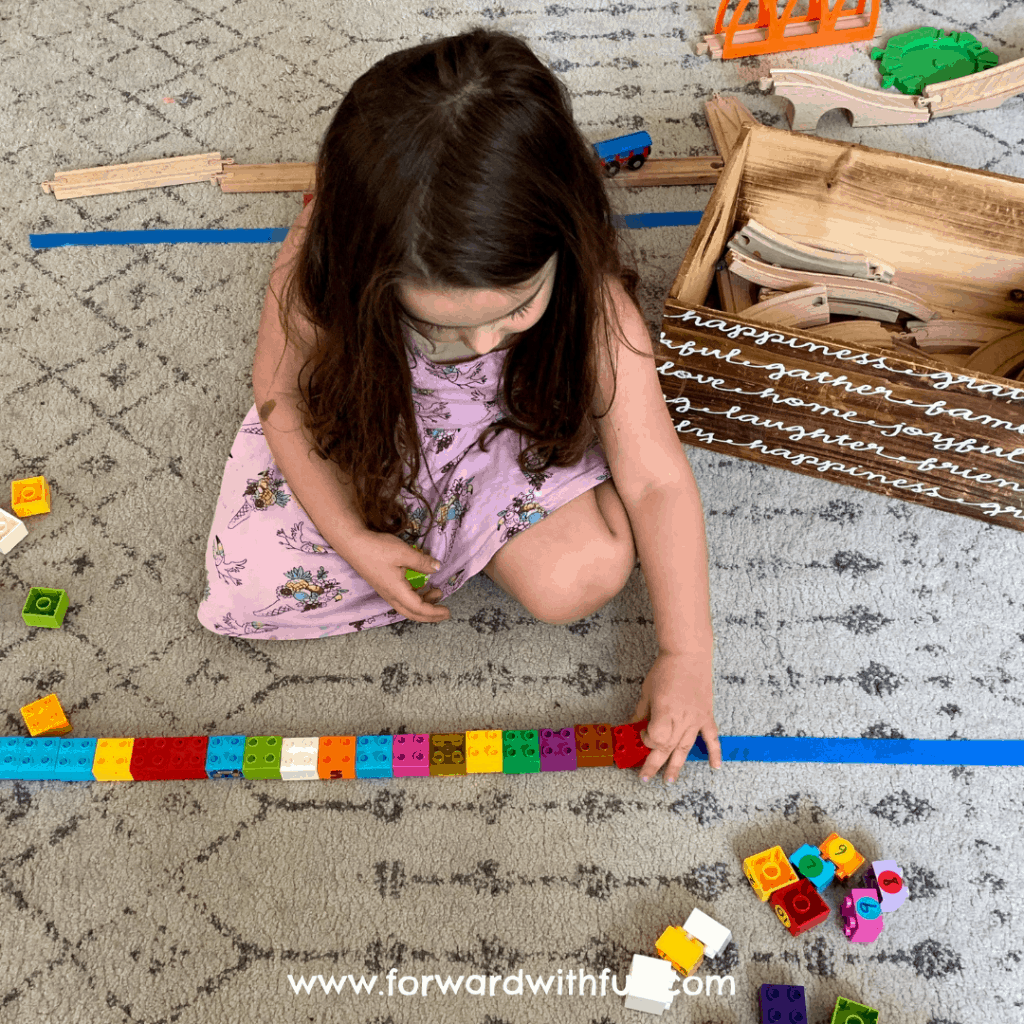
Part of measuring accurately is through lining up items end to end. When kids are using small items, they're working that pincer grasp or two fingered grip they need for beginning writing skills.
To learn more about how to teach your child how to measure while incorporating fine motor movements check out my post on Measuring Me.
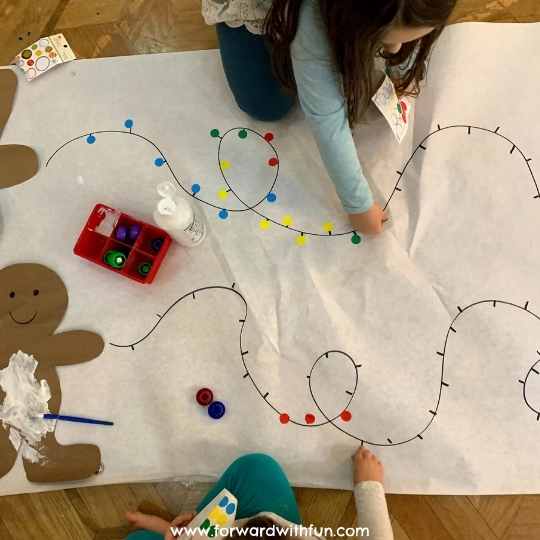
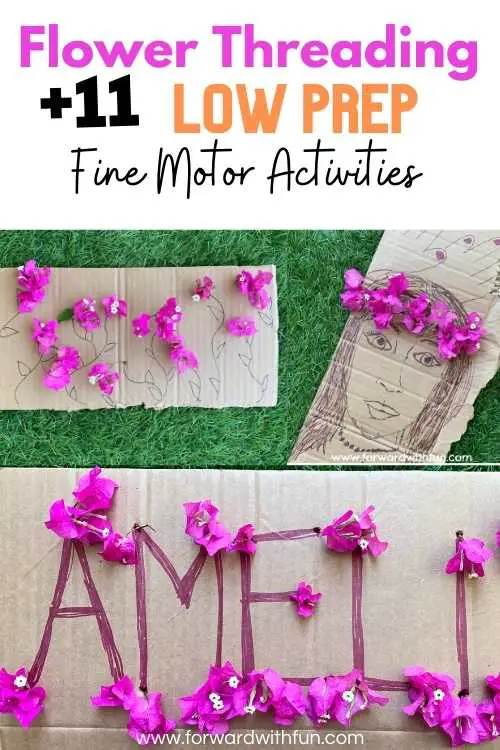
Try these fine motor skills activities for preschoolers who love nature! Draw a picture on some cardstock or cardboard and poke some holes through to have your little one decorate with any stem.
As they place the flower or leaf in the holes, preschoolers will work on placing the small stem with accuracy and that elusive pincer grip using the thumb and pointer finger. The product is always beautiful!
This great quiet time activity engages preschoolers in fine motor play with plenty of organic opportunities to learn about shapes while practicing fine motor skills.
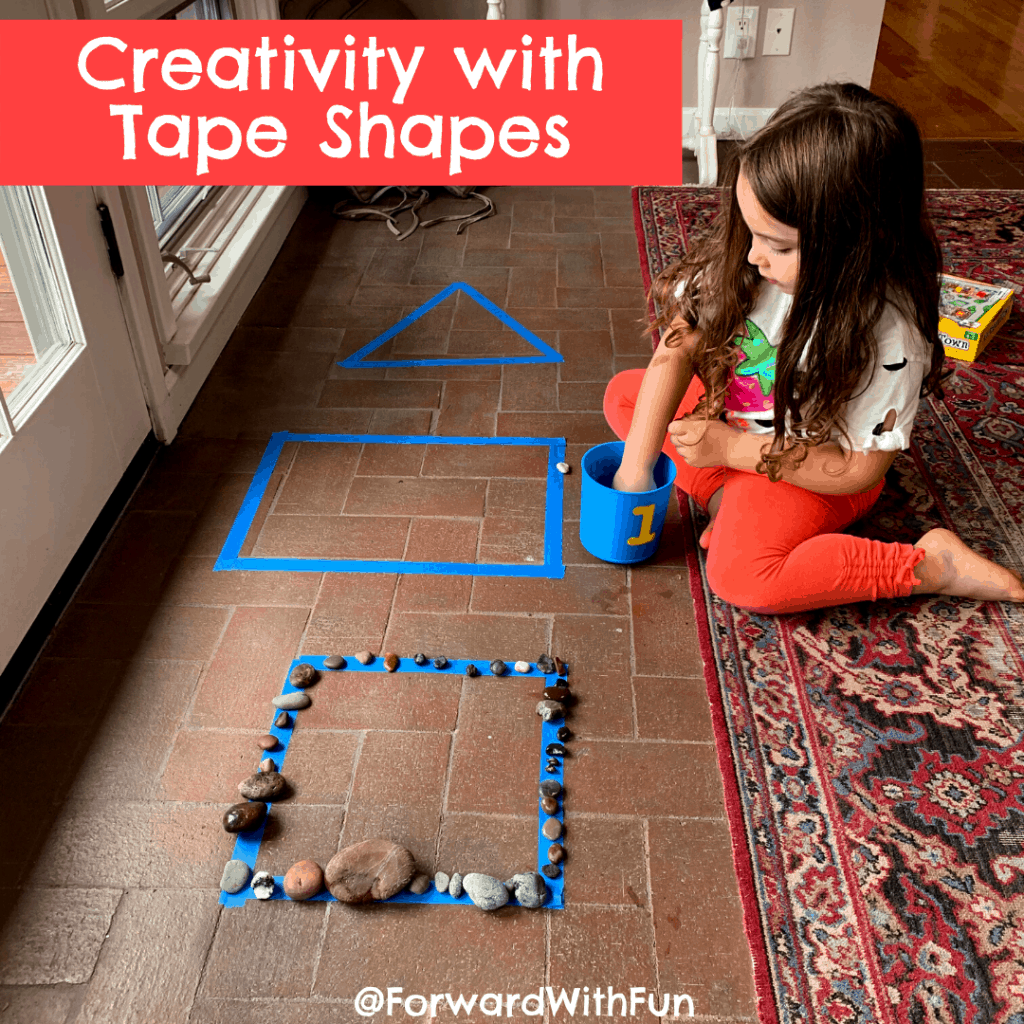
Combine shapes with fine motor skills in quiet time activity for preschoolers
The AT word family is one of the first sets of words young children learn to read, usually in kindergarten. These words are practiced as part of a word family.
A word family is a set of words with the same ending. The words in a word family always rhyme.
Here is a downloadable list of words from the AT word family. Just click to download and read on for some great printable worksheets and activities to teach the words in the AT word family.

When kids are first starting to read, they usually begin reading CVC words. CVC stands for consonant vowel consonant words.
The AT word family is one of the first, if not THE first, family of words children practice reading in school. Since “a” is the first letter of the alphabet, children are usually most familiar with its sound out of the vowels: a, e, i, o, and u. “T” is also another sound kids more easily remember.
*As an Amazon affiliate, I may get a small commission for purchases made through links in this post.
These FREE downloadable worksheets will help your child build fluency with the words in the AT family.
When working with the list and flashcards in the printable packet, I recommend using the 3 letter CVC words for beginning readers. The 4 letter words (CCVC words) are only for a challenge.
There are so many hands-on ways to use the AT word family flashcards for activities and games that your kid will love. I find that just going through the flashcards can be boring, so check out the activities we played with them below!

Page 1 of 2 Flashcards


Okay so I usually call this game, SWAT it, but it didn't rhyme, SPLAT the AT word it is!
Use those flashcards you just printed out and call out a word. Kids love getting permission to make something go SPLAT! Make sure to use blue painters tape so you don't ruin your walls!

Kids absolutely love muffin pan spelling so if you're looking to try this with other word families you can find more picture cards there. We use any muffin pan and these soft and magnetic Coogam letters.
Try this game with one of two ways:

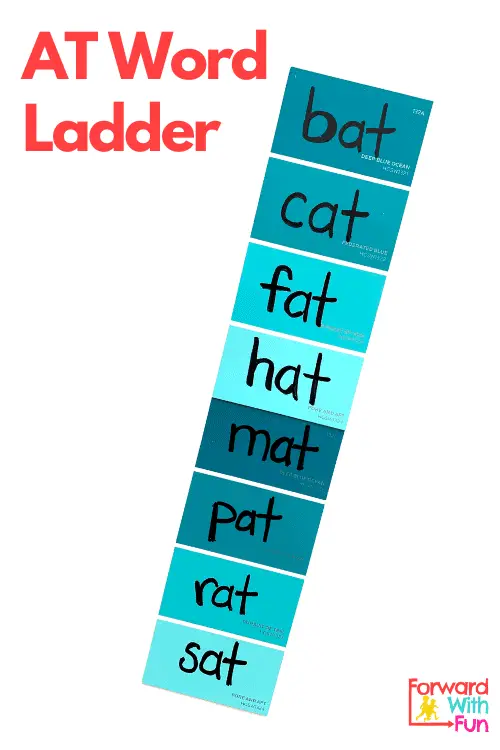
Create a word ladder listing all the words you can think of that rhyme with at! Display them with Post-its, flashcards, or these cute paint chip cards.
Using the picture and word flashcards from the AT word packet, play a classic game of memory. Take turns flipping two cards and if they match, you keep them. Continue flipping them over till all are gone.

This is pretty intuitive, but a simple sorting game can be great practice. Read the word and match it with the picture.
As kids sound out the words, they're practicing their phonics letter/sound association, but they also need to be able to BLEND those three sounds together to make the word, which is a very important phonemic awareness skill that lots of people don't know to practice.

Let's really lean in to that family part of "word family." All these words live together! So let's give them a house.

I created this printer friendly (black and white) decodable book to help kids practice reading words in the -at family. It’s FREE to print and use with your child. They can even color it in. Maybe it’ll be the very first book they read!

Kids are expected to read most CVC (consonant vowel consonant words) at the end of kindergarten based on Kindergarten Common Core Standard CCSS.ELA-LITERACY.RF.K.2.D. Since the AT family is usually the first set of words children learn to decode (sound out) independently, they are likely to begin reading these words around the middle of kindergarten.
But I want to make sure I say that everyone is different and that's okay! Not all kids will read these words in kindergarten.
According to understood.org, "Not all kids develop reading skills at the same rate. Taking longer doesn’t mean they’re not on track to become good readers." That's a very important reminder for parents in this world where we are constantly comparing ourselves and our kids.
Other families to work on after the -at word family would be the -ag, -ad, -am, and -an families.
I've created these activities and printables for the -an word family just for you!
The letters in all these families use the usual phonetic sounds for each letter so they don’t confuse beginning readers (unlike the -ar and-as word families where there are letters making irregular sounds like the “a” in far and the “s” in has).
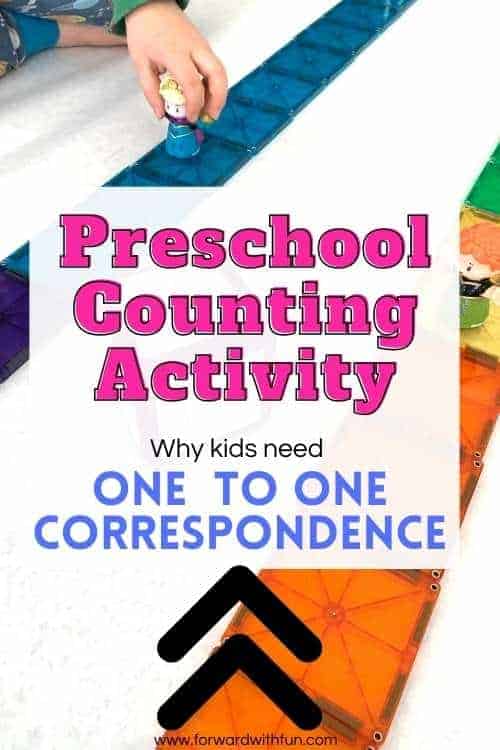
Does your young child have 1 to 1 correspondence? If they don't, they may count objects too fast and accidentally skip over items or count the same one twice.
The 1 to 1 correspondence definition is counting one number for every object counted. Simple put, it's counting accurately. This is very different from rote counting, which is just saying the numbers in order.
One to one correspondence develops for numbers under 5 in the preschool years and by the end of kindergarten, kids are expected to accurately count up to 20 objects.
*As an Amazon affiliate, I may get a small commission for purchases made through links in this post, most likely pennies ; )
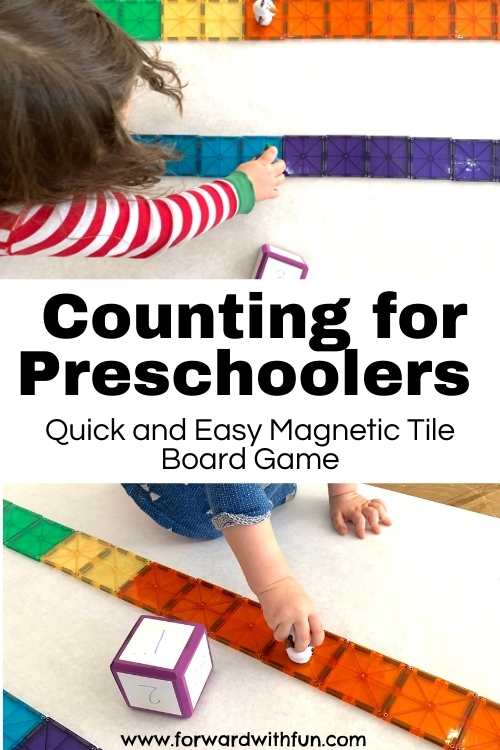
Making the board game together will be a great opportunity for practicing 1 to 1 correspondence.
We chose to have two separate tracks, but really you can make a board that all players use!
When making two seperate tracks, it was important that both players had the same number of Magna-tiles, or the game wouldn't be fair. This led us to deciding a certain number and counting that many squares together.
For counting larger numbers, it is important that children move each piece as they count one more in order to keep track.

Lil Sis (2.5 years) doesn't yet have 1 to 1 correspondence so I tried these methods to help her better understand:
From beginning to end, she did begin counting with greater accuracy, and as we played again and again, she understood much more.
Kids make a lot of mistakes while rote counting, meaning they're just saying the sequence of numbers they've memorized. In a game, the numbers translate to movements on the board.
By actually having to move each piece only that amount, kids are more focused on counting slowly, leading to greater accuracy.
When kids are counting groups of objects by sight or just by pointing to each item (this happens often in number books when there are no actual manipulatives to move) they more easily lose track of the number of objects.
Giving children manipulatives (actual objects) and asking them to physically pick up and move each item will develop the 1 to 1 correspondence concept that every number said stands for one more item.
To sum it up, help your child develop 1 to 1 correspondence by making sure:
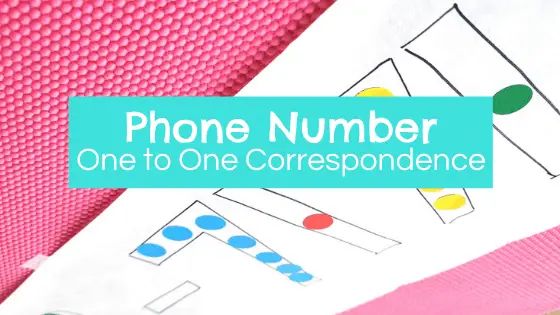
An excellent 1 to 1 correspondence activity that makes sure to do all these things is Dot Sticker Phone Numbers.
Leave a comment below to let me know how you practice 1 to 1 correspondence with your child!
Teaching 3D shapes in kindergarten? Or wanting to build your child's spatial intelligence and math vocabulary? These 9 simple games can be played with kids 3+ and are the perfect centers activities for teaching 3D shapes in kindergarten!
*As an Amazon affiliate, I may get a small commission for purchases made through links in this post.
Here's a little refresher photo labeling the 3D shapes for you. Notice that there are 2 kinds of pyramids!
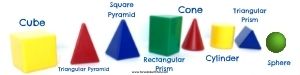
Here are the Learning Resources 3D Shapes we used for most of our activities. You can use household items or blocks too!
All of these 3D shapes activities are under 5 minutes to prep, and if you're looking for some printable 3D shapes worksheets for kindergarten centers, check out #3 and #4 for some mega-fun hands-on learning printables.
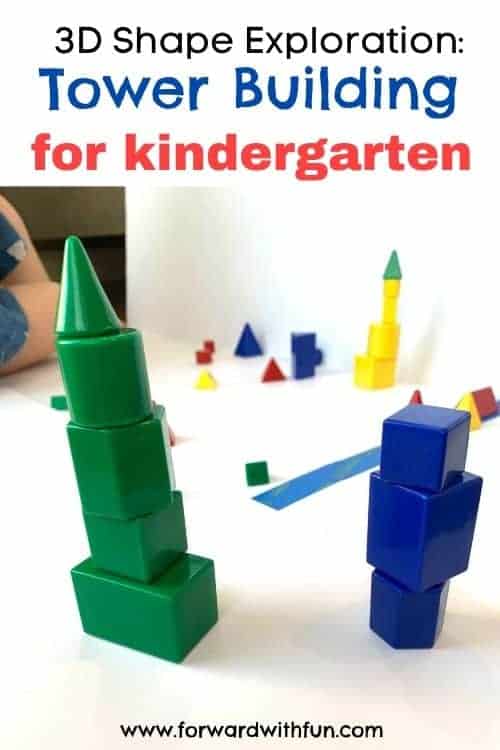
Using the blocks that you have invite your child/students to create a tower. As they build, you can help them name the shapes they're using. Child directed play is often the most engaging way to learn, and by using the strategy of "Saying what you see" you're helping build new vocabulary.
This 3d shapes activity is wonderful for introducing the shapes to your kindergarteners, who at this point, may only be familiar with 2d shape names.
As a bonus, you could have them graph or tally the number of each shape they used in their building.
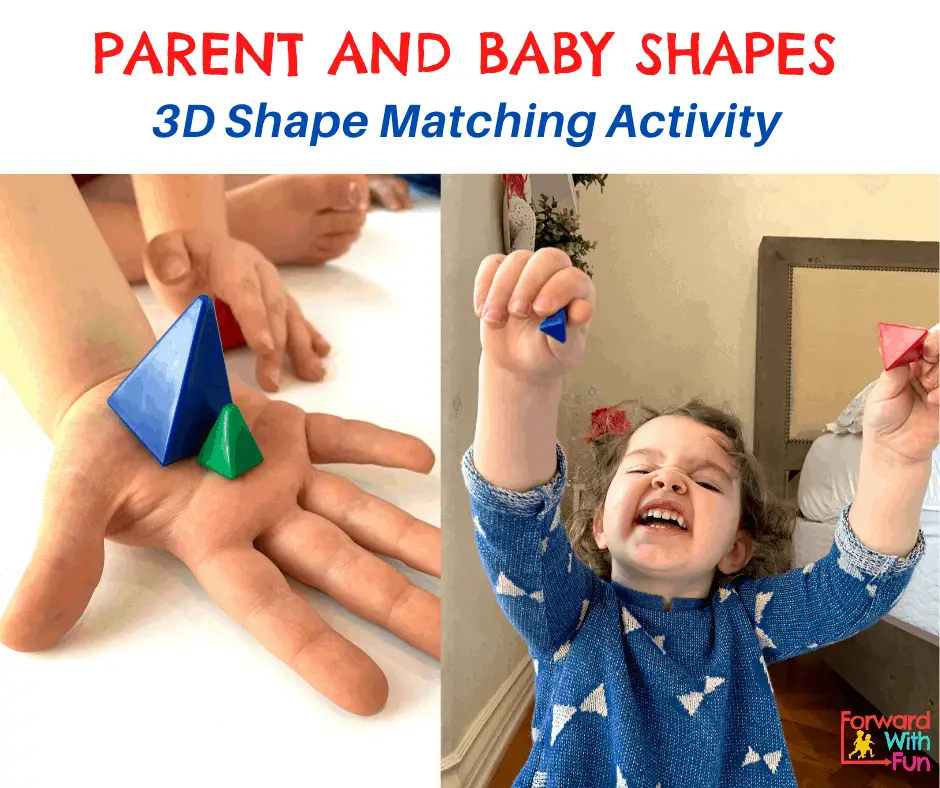
My kids LOVE to make families when they're playing whether it's dinosaurs, cars, princesses, or just rocks. They often hands me something big and something little and say, "That's the mama, and that's the baby."
Use this to your advantage to play Mama and Baby or any other caregiving relationship with the 3D shapes. For this one you'll need shapes of varying sizes.
I bought this set from Learning Resources because they had a wide range of shapes and sizes. For more 2D shape matching, you'll definitely want to check out this activity that kept both my kids busy for 30 min!
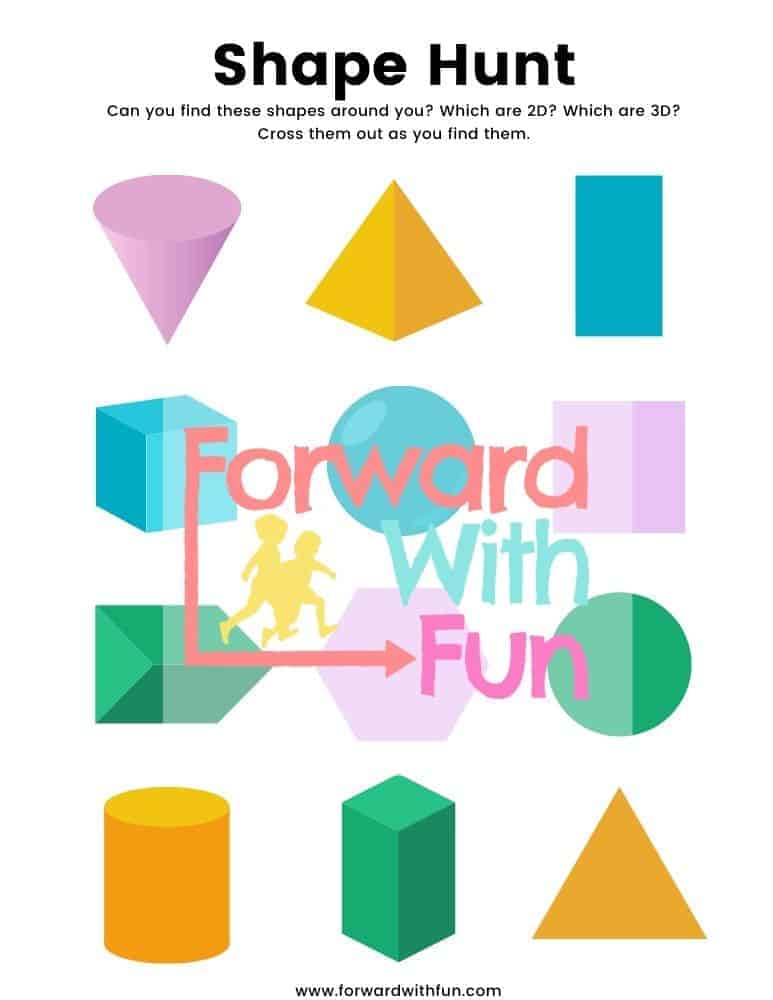
This can be done very informally by going on a "Shape Hunt" around your home, neighborhood, or school. If you want to keep track and make it official, bust out a clipboard (or just a book with a chip clip) and make a 3D shape tracker, so kids can keep track of what they see.
What shapes are around your home? Are they 2D and flat? Are they 3D and pop up? The kitchen has a lot of great shapes...
Download your shape hunt right now for only $1.11!
This out of the box shapes activity is the perfect at home invitation to play or a kindergarten math center that EVERY child adores.
Remember when I said, kids think outside the box? Well, instead of just comparing the sides of shapes or corners, let's compare how they move in space.
Does the 3D shape slide? Does it roll? Can you stack it?
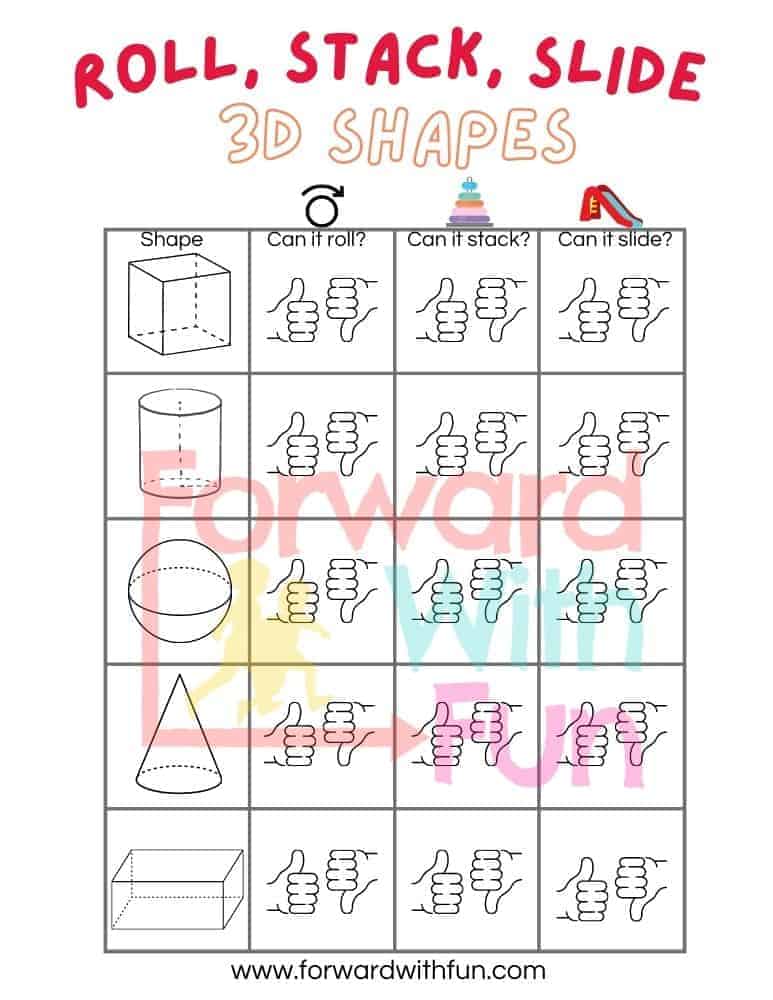
Want this instant printable for Roll, Slide, Stack? Click HERE.
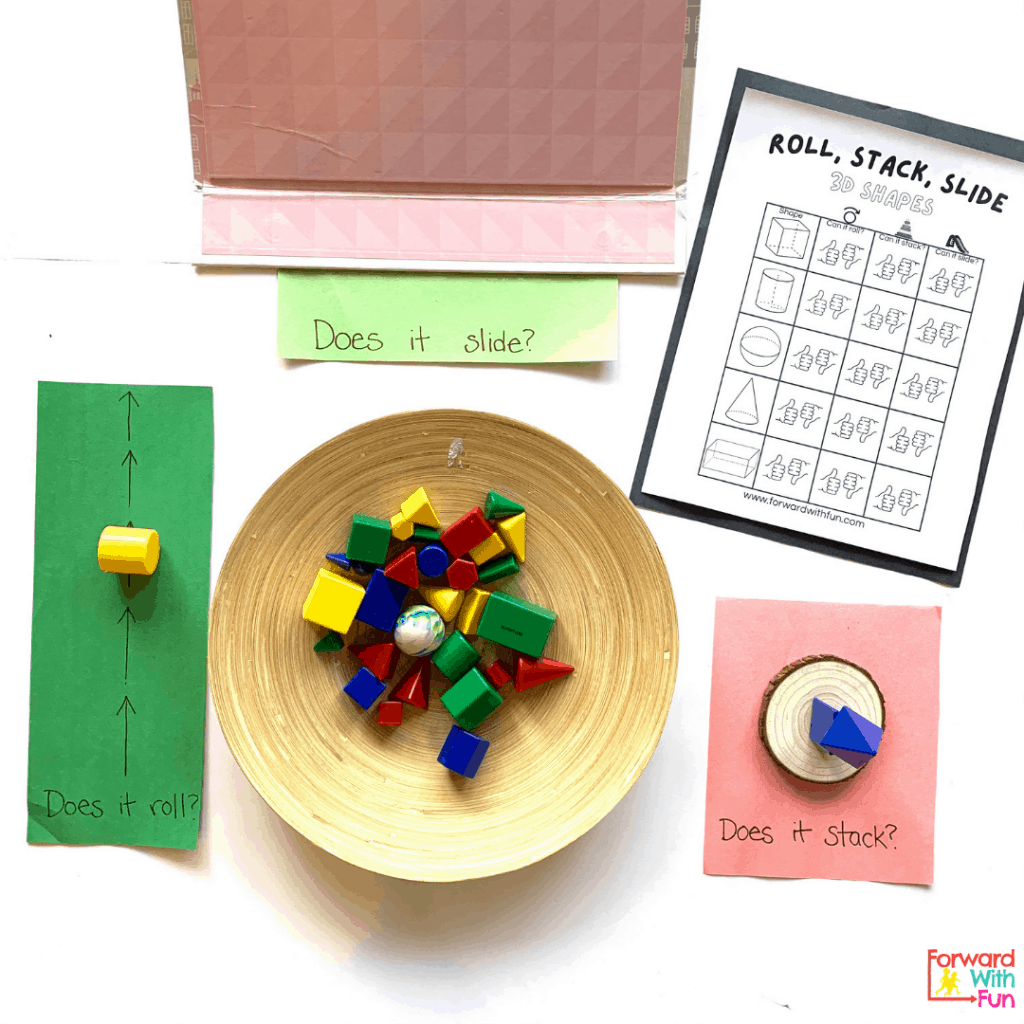
For kids learning 3D shapes in kindergarten, having independent activities is key! The recording sheet has visuals for each step, so that if your child isn't reading yet, they can still do this on their own.
Just PRINT the 3D shapes worksheet and kindergarten math centers are done! Even if kids can't read, they can still be self directed because it has visuals for each item. : )
Set up an area with the 3D shapes and a makeshift slide and play. Kids will LOVE comparing and contrasting 3D shapes as they play to learn.
This "Who Done It" game elicits very thoughtful responses from kindergarteners. Line up all the 3D shapes in what will be the criminal line up.
Announce that one of these shapes has committed a crime. Kids are adamant about ensuring the justice will be served.
Decide who committed the crime! (Write your answer on a sheet of paper, i.e. the smallest blue cone.)
Have your student ask YES or NO questions that describe the shapes in the line up, then, eliminate them by their attributes.
For example, "Does this 3D shape have a circle on one side? Does this 3D shape have vertices (corners)?"
Weed out the innocent shapes till you find the criminal among your 3D shapes (but make sure it gets a fair trial).

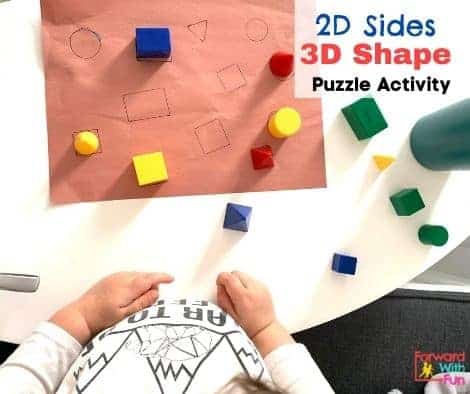
On a piece of construction paper, trace around the shapes you want to give your kids. These will be the 2D sides that they're likely familiar with.
Next, ask them to name the shapes on the paper... Now what is different about the 3D shapes?
Can they match them to the 2D (aka FLAT) sides that are on the paper to complete the shapes puzzle?
If your child is having a hard time distinguishing between 2D and 3D shapes, I highly recommend this video by the always funny, Mr. B's Brain.
I love how he describes the difference between 2D and 3D shapes in a way that is so simple to understand for young learners.
He shares that 2D shapes go two ways: side to side and up and down. In contract, 3D shapes go three ways: up and down, side to side, and back and forth. Check it out!
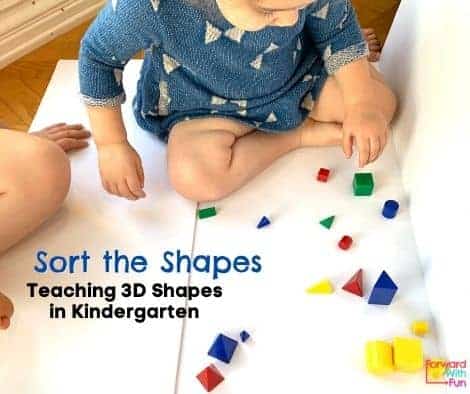
Of course, when we see these engaging, colorful shapes we start categorizing them in our mind. Sorting is a major math skill that I describe in this activity where I have the kids do the laundry and build math skills at the same time.
Challenge your kids to sort in different ways: color, size, shape (duh) but maybe they'll even astound you and sort by number of sides or has corners vs. not.
Kids are more likely to think outside the box than adults, so let them lead this activity and you'll probably be surprised!
Naming and comparing shapes are big geometry standards in kindergarten. Here are some of the kindergarten common core geometry standards from https://www.cde.ca.gov/be/st/ss/documents/ccssmathstandardaug2013.pdf
Looking for more shapes activities?
For the 100th day of our Covid-19 quarantine kindergarten, my kids and I created counting collections of 100 items.
As part of kindergarten standard K.CC.A.1 in the US kids must count to 100 by ones and tens. The 100th day of school is the perfect time to practice counting to 100 and to create student led counting collections that expand kids number sense and challenge them to count higher than they have before!
When kids understand the number 100 to be ten groups of 10, they're really building their comprehension of our base ten number system and beginning to learn about place value.
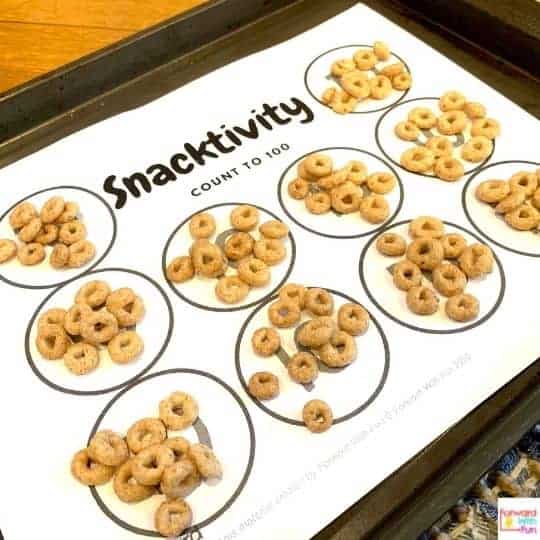
A counting collection is any number of objects that you count out and put together. It can be a collection of a specific kind of object, or it can be different sets of objects.
You can start with a number in mind, like we did with counting to 100, or you can work towards discovering how many of an object you have.
In order to be successful completing a counting collection, kids will have to keep track of what they counted and count orally with one to one correspondence.
Kids of any age can participate in counting collections, as there is no specific end number. Create a collection of 20, 50, 100, or more!
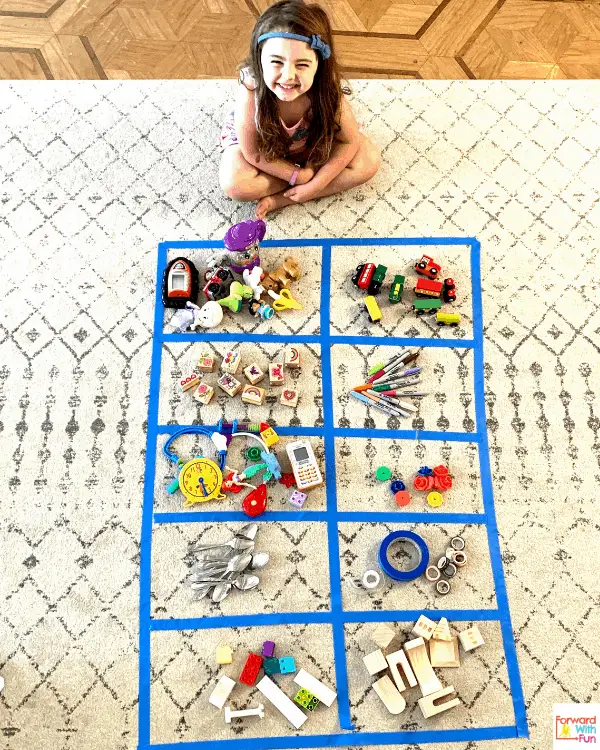
One hundred is a BIG number so for a counting collection to work, children must have a way of keeping track of what they have counted. This could be through providing a pen and paper or creating a system to separated counted from uncounted objects.
Though kids usually come up with their own systems, we used a ten frame because it was my oldest child's first time counting to 100, and a ten frame is a great way to show ten groups of 10! It's also an easy way to check your work without having to start all the way at the beginning.
Counting collections are more than just counting orally as high as you can. Rather they are opportunities to develop number sense- the understanding of how numbers relate to one another.
For example, Big Sis sometimes put more than 10 objects in the ten frame. I would point it out and she would have to count backwards or sometimes remove objects and recount the whole group. When should couldn't find enough of a certain object, we would ask ourselves, "Hmmm, how many more do we need to get to ten in that box?"
Not only was she counting, she was relating numbers to one another, problem solving, and doing addition and subtraction.
Also, not much time is spent in younger years counting to large numbers. Spending time counting to higher numbers helps kids to conceptualize what quantities look like. So often, those large numbers seem unfathomable to children. 100 seems like such a HUMONGOUS number to preschoolers and kindergartners, but doing a counting collection in a ten frame breaks it down into smaller groups.
Wouldn't it be great if mess free painting really existed? What if there was a world where I could let my 2 year old paint to her heart's content without it getting ALL over her hands, clothes, and then the couch, walls, and every other surface in the house?
When my Big Sis was two, we attended a messy art camp and the teacher set up an activity where the kids painted with shaving cream. She really dug it to the point where I went out and bought shaving cream and did it all outside but it was SUCH A HUGE MESS. I thought never again.
I had to find a way to make painting mess free, so here you go! This project is my major toddler painting hack that allow kids to explore color mixing and paint to their hearts content without the mess!
*As an Amazon affiliate, I may get a small commission for purchases made through links in this post.
From my teaching days in the classroom, I have learned that not all "washable" tempera paints are true to their name. I basically only trust two brands of tempera paint that say washable. Have you found one you love? Is it one of these? I'd love to know!
This is a truly perfect painting activity for toddlers. You don't need to worry about them eating paint, messing up their clothes, or accidentally touching something and leaving a cute but messy handprint.
Before you start, pick out 3-4 colors that mix well together. You could go for cool colors like blues and greens, or warm colors like red, orange, yellow. Purple, red, and pink is another favorite. You can always add in white too. If you use colors like purple + orange or green + red your colors will all turn to brown. To find out some more colors that mix well together check out this blog post by activityvillage.co.uk.
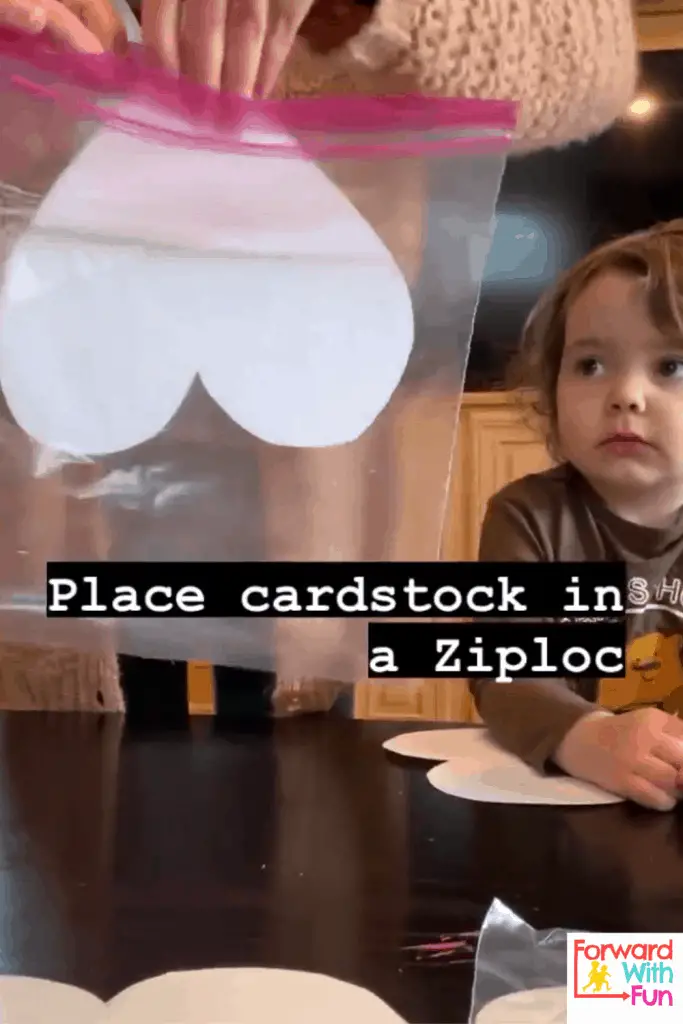
Step 1: Cut a piece of card stock into any shape you want and place it inside the Ziploc bag.
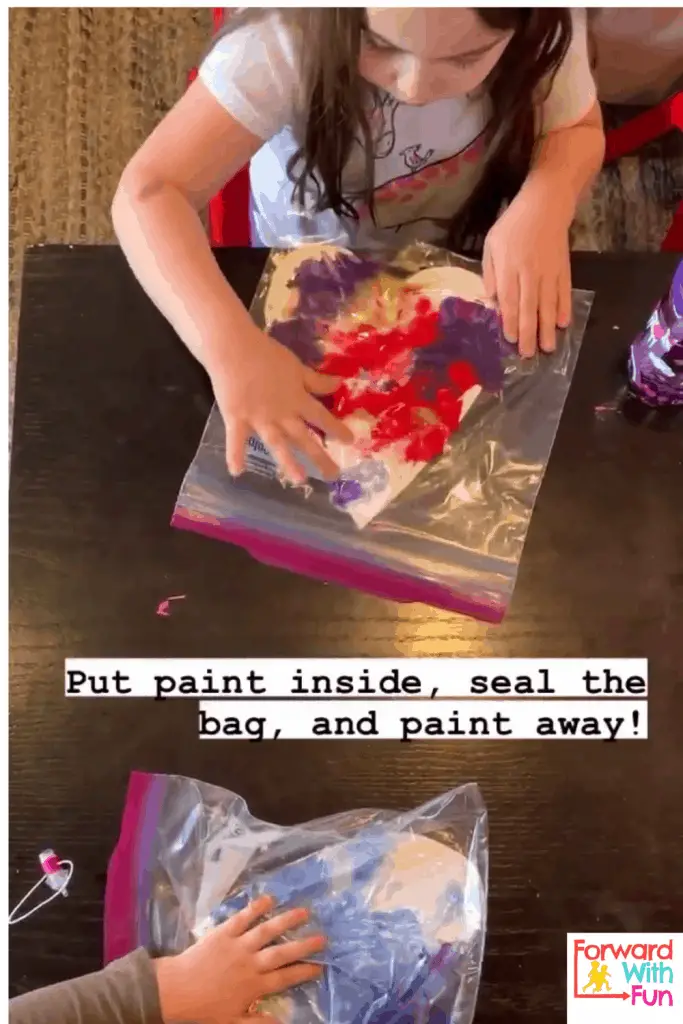
Step 2: Squeeze dollops of the paints you have decided on, on top of the card stock.
Step 3: Make sure you close the top of the Ziploc. I really do prefer the brand name because I can count on a good seal!
Step 4: Let your child mix and mash the colors using their hands, paintbrushes, or any other material from the outside.
Step 5: Take the card stock out to dry.
Step 6, Optional: Once the painting is dry, you can cut out a shape from it and paste it onto a piece of construction paper or white card stock to provide contrast.
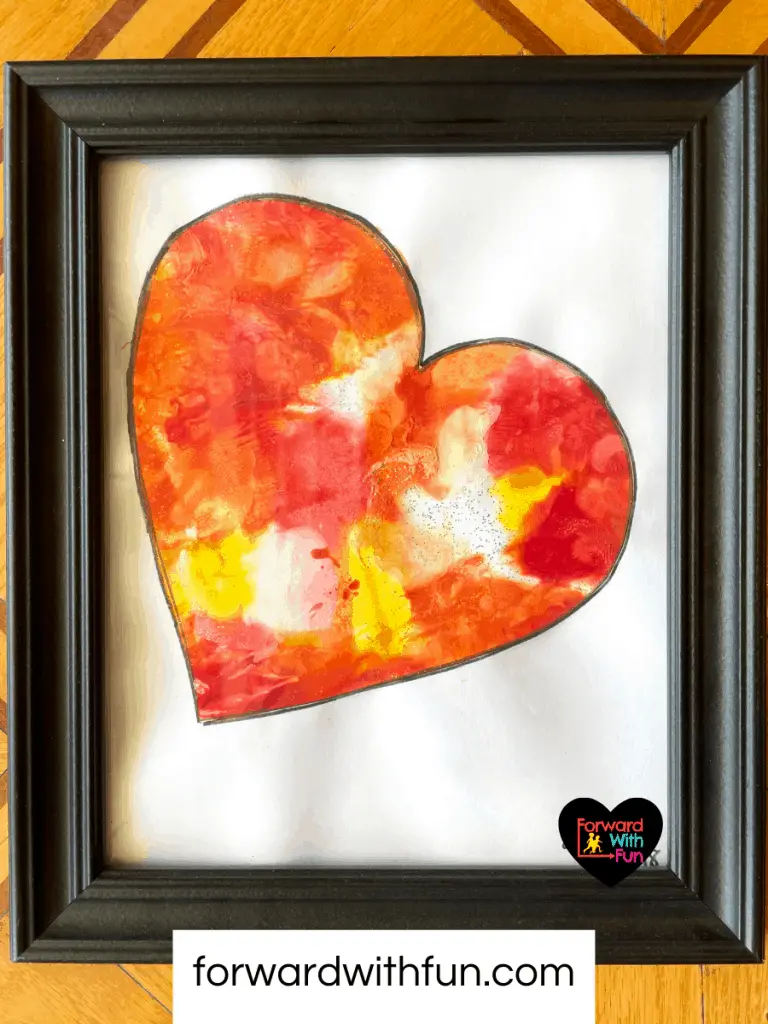
Mess free paintings in a bag end up being beautiful art pieces that you can frame or gift. Even 6 month old babies have made these for special events like Father's Day and Mother's Day. I love that these paintings are truly made by the child, so they're authentic early pieces in your child's life.
If you're looking for some more fun ways to entertain your toddler, 2 year old, or 3 year old, check out these 10 Sticky Walls you won't wanna miss.

I used to hate teaching sight words with worksheets and flashcards. Students would be frustrated about having to memorize words that didn't follow phonetic "sounding out" rules. It got to the point where even I was saying "I know. Sight words are boring."
So I had to do something about it. Instead of boring old school flashcards, I wanted to make sight words fun with hands on learning games that kids love. There is not a worksheet in sight.
These games will involve sticking, throwing, swatting, jumping, popping and more, but before we jump in, do you know what a sight word is and which ones to choose?
*As an Amazon affiliate, I may get a small commission for purchases made through links in this post.What's a sight word?
Sight words are words that show up all the time when we are reading, and often they don't follow phonetic rules. Words like of, the, could, and is just don't sound like they're spelled! They're also commonly called "high frequency words."
You might have heard of Dolch sight words and Fry sight words. They're both lists of words that schools use to determine which words to teach.
The Dolch Sight Words list can be found here, and they're based on a study by Dr. Edward Dolch who created lists of the most frequently used words in children's literature from the 1930-1940's (kinda outdated). They are conveniently separated into Pre-K, Kindergarten, first, second, and third grade lists though!
The Fry Sight Words list can be found here. Another Edward, Dr. Edward Fry decided to create a more modern list and break it down into lists of 100 most frequently used words in kids books. His lists were created in the 1950's but were update in the 1980's. I use the Fry's First 100 List to choose words to focus on with my kids.
The key to learning sight words is memorization, so that newer readers can recognize them quickly and spend their decoding skills on words that are phonetic (sound like they're spelled).
I recommend keeping the words you are practicing up on a Word Wall that your child will pass by everyday and add a new word a week. You can create a simple sight word wall in your home or classroom and it's a great example of environmental print. It'll help you keep track of which words your class or child has mastered!

Write the sight words that your child is learning on construction paper and tape them to the wall.
Then write the words four times each on Post-it notes and hide them around your home. Have your child find and match the sight word to it's larger version, reading the word each time. It's like hide n seek meets sight word matching game.

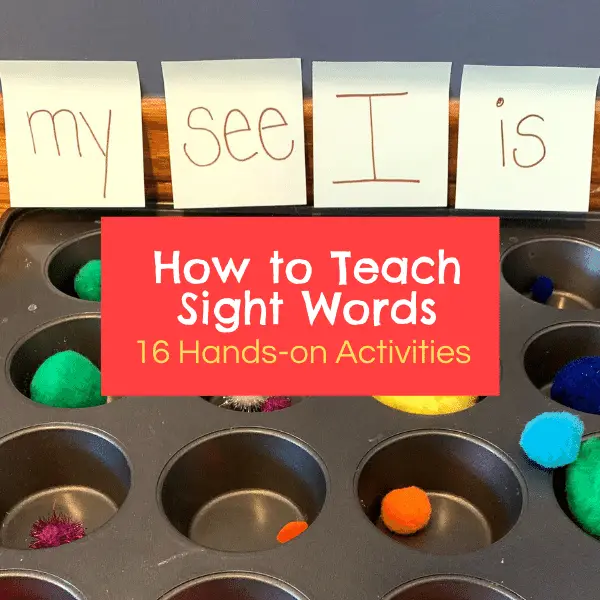
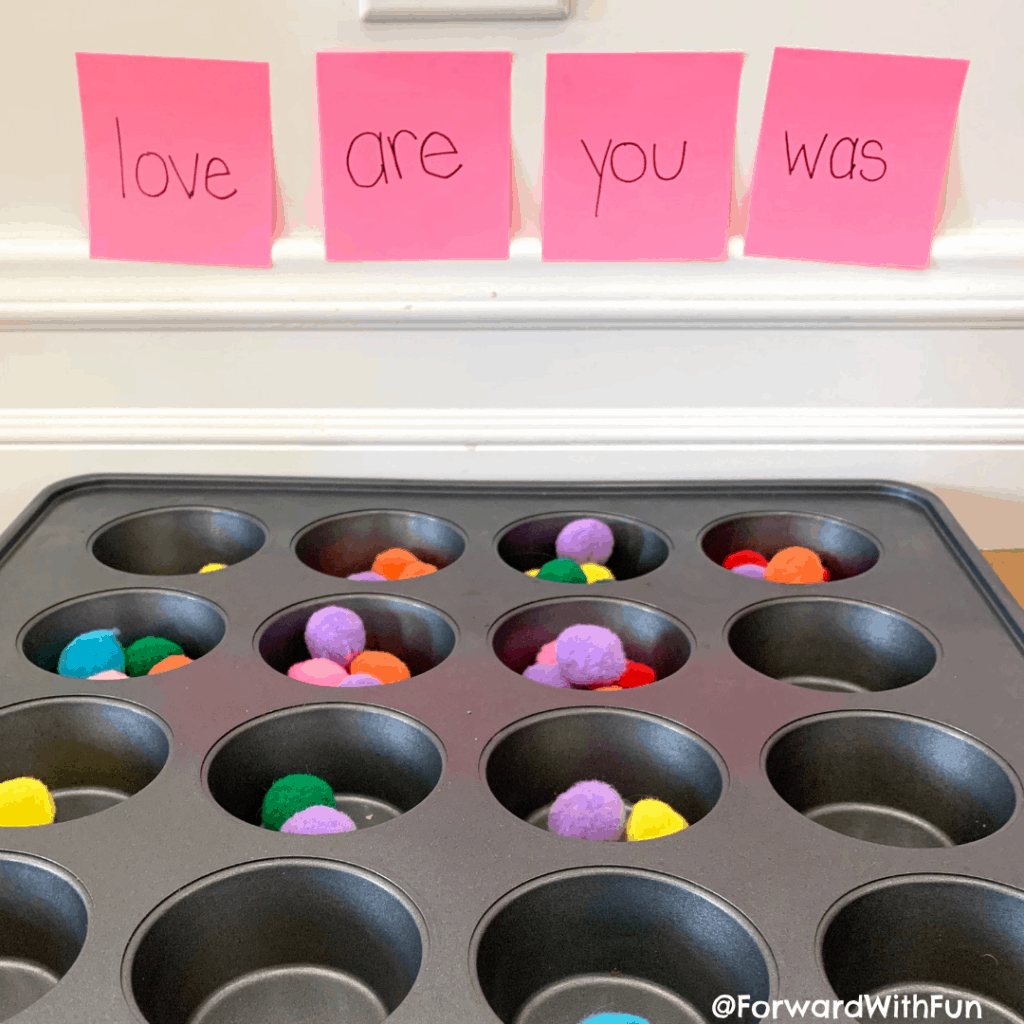
Grab some pom poms and a muffin pan along with my favorite supply Post-its. Write the sight words on the Post-its and place them on the wall, lined up with the rows of the muffin pan. Next, take a few steps back and throw pom poms into the muffin pan. Every time your child scores a "goal" they need to read the word at the top of that row.
In this one, kids are imagining they're shopping for groceries.
You can use pretend food but if you don't already have that, just use what's in your pantry! Label the foods with dot stickers after writing sight words on them. Write matching sight words on the grocery bags, and have your little shopper read and match the sight word on the food to the bag.

Post-its are a must-have for so many games including this one. The sight words are written on the sticky notes and placed onto the steps in our home.
As your child goes up and down the steps, they read each word as they get to the top. Don't have enough words for each step?
Repeating words gives your child lots of good exposure and helps those sight words stick in their brains!

This reading game can be used with sight words, CVC words, letters or even numbers...
Just write the sight words on the Post-its and place them atop of some opaque containers.
One container hides the hidden object? Can you find it? Kids must read the word on top of the container before they check under the container for the hidden object.

I love this idea from simpleplayideas.com Fold the index cards and then have your child's favorite superhero smash the sight words you call out. Each word they smash correctly, they get to keep in their pile.
A simple sight word memory game only takes one minute to prep. Choose 5-10 words that are on your child's list and write them on index cards. Then write them a second time on another set of index cards. Make sure you use pencil so that you can't read the card from the back. Flip them all over and play Memory! Try to make a match, taking turns to flip 2 cards.
It doesn't look glamorous but I can assure you, kids love this sight words memory game and it provides LOTS of opportunities to memorize the target words.

This gross motor game involves motor planning, reading, and best of all, kids love it.
Use a fly swatter or any soft object to whack the high frequency words. Your little reader has been waiting all their lives for permission to swat stuff, am I right?
Do a speed round! Now you're starting to see why you really need to get some Post-its, huh? You can also use Sight Words Swat as a hands-on way to teach numbers and letters too.

Create a parking lot by drawing a simple aerial view then filling in each spot with sight words. Grab the tons of race cars your child loves to zip and zoom around the house with and label each car with a matching word, using dot stickers.
This clever game comes from jugglingwithkids.com.
Using blue painters tape and Post-its create an obstacle course on the floor. Sprinkle in the Post-its with sight words written on them as stopping points.
Kids must complete the obstacle course doing different movements: tip top, hopping, skipping, balancing on a tight rope and stop to read each word before moving on.
They'll want to do it so many times, which will give them ample practice!

Quick and low prep practice: you don't need anything but dot stickers and paper plus a writing utensil.
Write out 4-5 sight words on your dot stickers filling out the sheet. Then write them again on a sheet of paper the same number of times.
Hand your kiddo the sheet and have them match the words on the dots to the ones on the paper. This is a fabulous fine motor activity for little hands, as they peel the stickers off the sheets.

Write down the words your child is working on in large lettering then tape them on empty grocery bags and play ball in the house. Can you aim for the high frequency word and get your ball in the bag?
Read the word as you score a goal. That's a ton of great exposure!

Lately we have been getting lots of packages, especially after Lil Sis's birthday, and the kids fight over the bubble wrap more than they do the toy! Let's make good use of the packaging and great a pop-a-word game just by writing words in Sharpie on top.
With smaller bubble wrap, write the words on top and have kids read then pop with a hammer or their fingers.


For this game you'll need a muffin pan and index cards. Cut the index cards in half.
Pick one target sight word and write it on 5 index cards. For the rest of the spots, write other sight words (one each) . Fold all the cards and put one index card in each muffin spot.
Then cover the whole thing with aluminum foil.
Give your child a straw or other pokey object and tell them, their job is to find the target word 5 times to win.
Kids LOVE exposing the words in the muffin pan and as they find each one, they'll read them trying to see if they found the "target" sight word.
Here is what the muffin pan looks like before I covered it with aluminum foil.

You're gonna love this one. Just get out your deck of cards, a piece of paper, and a marker or make one like ours on canva.com for free! I copy and pasted the two words we are learning this week each 25 times on the paper and sprinkled in K, Q, and J for the face cards.
At the top I wrote "was" in red and "of" in black. If the kids flip a red card, they scratch out the word written in red, that many times and the same for the second word if they choose a black card.
If they get a face card, they scratch out the K, Q, or J!

Now this one, you can do anytime and anywhere. Bored at a restaurant? Waiting for dinner to be ready?
This perfect partner activity replaces the X's and O's in tic-tac-toe with sight words so kids get some great writing and spelling practice. Make sure to switch words, so both players gets a turn to practice each word.


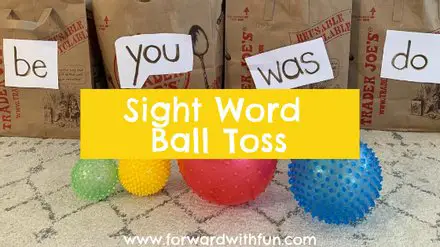
Gotta an active kid who won't sit still for learning time? They'll love learning to read sight words with this ball toss game!
Sight words are a huge part of kindergarten reading that continues into first and second grade. I wouldn't stress about sight words unless your child is being assigned them by a teacher or your child can already CVC (consonant vowel consonant) words with ease. Reading sight words, also known as high frequency words, is really essential when it comes to beginning to read sentences.
Sight words are often taught in lists and flash cards, but that's not my hands-on style. So I've devised way too many sight word games to keep learning fresh and fun. Here are some other games on my site that you can use with sight words:
To begin this ball toss reading game, I would select 2-3 sight words your child is already confident reading and 2-3 that they don't know. If you're just starting out with sight words, you can use letters that they know for some bags and then sight words such as "am," "I," and "is," for ones they don't know.
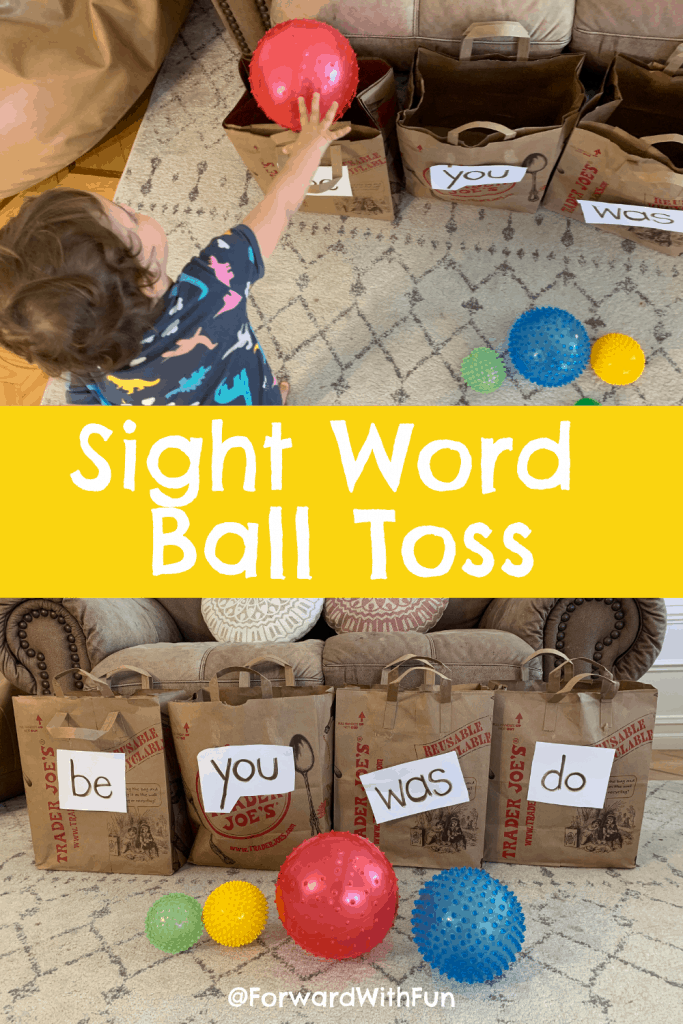
Write the sight words in large lowercase lettering and cut them out before sticking them onto the boxes, containers, or grocery bags. I love reusing grocery bags for different projects and currently, we cannot bring in our own bags to the grocery stores due to Covid-19, so we ended up with a surplus of these sturdy Trader Joe's bags.
Gather some soft balls that are safe to throw indoors. Balls that bounce work the best. I placed the grocery bags in front of a couch so that balls that went to far had a chance to roll into the bags below.
Invite your child to play by showing them this exciting set-up and challenging them to making a goal. Each time they toss their ball they need to read the sight word of the bag they're aiming for. This way they'll get lots of good practice while also practicing their aim and throwing skills.
Have a little sibling? Invite them to join in. They don't need to read the words, or maybe you add on a Post-it with the individual letters they're learning (depending on their age) so that they can build early literacy skills as well.
Have an older sibling? Try it with spelling words and make it harder to make a basket. You could even introduce a rule like only overhand throws to make the gross motor part a much bigger challenge.
Try it out! Sight words take a lot of exposure to memorize, and memorization is often the only way to learn these "rule breaker" words. So the more sight word games you play, the more exposure your child will have, and it's much more fun to learn through a game than doing flash cards!
Grab a free week of hands-on learning perfect for kids aged 4-5.

Get ready to ditch worksheets and flashcards in favor of hands on reading games.
Lots of what kids learning in the first few years of school is about memorization: letters, letter sounds, sight words, shapes, colors, numbers, etc. Traditionally these types of things are taught with repetition through worksheets and flashcards.
But that's BORING! Okay, some kids might like those things, but I betcha that MORE children prefer to learn in a more hands on way.
“Tell me and I forget, teach me and I may remember, involve me and I learn."
Xunzi, Chinese Philosopher
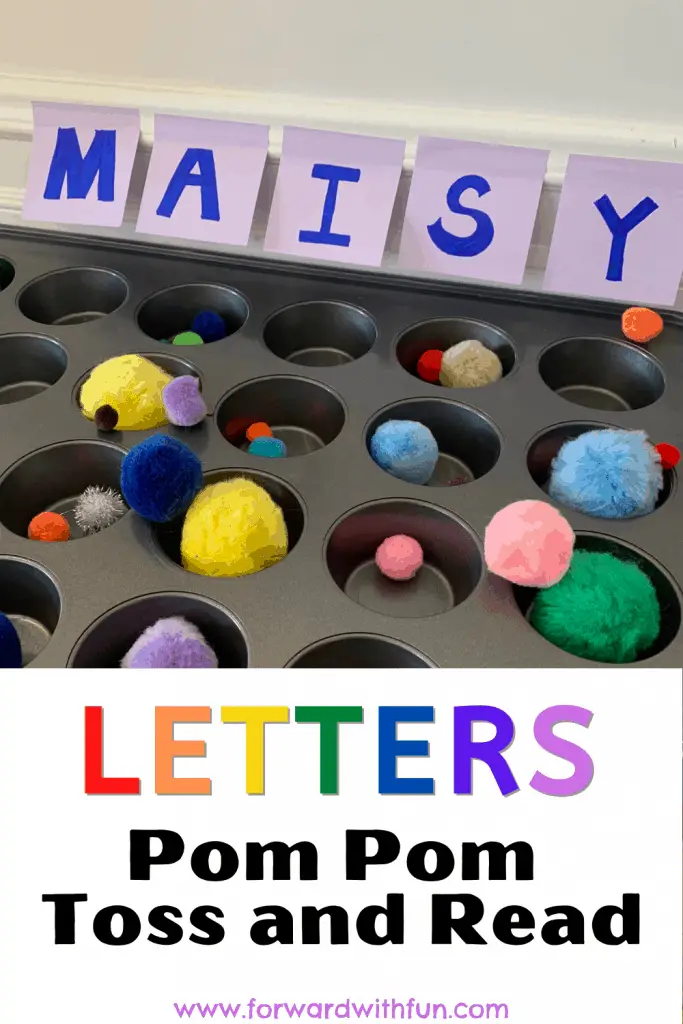
With hands on reading games like Pom Pom Toss and Read kids are more likely to memorize whatever reading skill they're working on because they're having fun and involved in play. I mean, when have you ever learned something new from a worksheet?
In Pom Pom Toss and Read I focus on sight words as an example, but this game can also be used to practice letters, letter sounds, vocabulary, or spelling.
*As an Amazon affiliate I may make a small commission from purchases made through this post, at no extra cost to you.
Write your 4 target sight words on Post-its and place them in a line like in the picture. Line your muffin pan up with the words so that the rows lead down from the sight words. You can also use letters, vocab words, spelling words, or CVC words.
Have your child toss pom poms into the pan. Whenever they make a "goal," they need to read the word at the top of that row! Play along with them. Celebrate your goals and read out the words.
Got a little one working on learning letters in their name or learning the alphabet? Instead of sight words, just write letters on the post-its and have them yell out the letter name or letter sound when they score a "goal."
I've compiled 16 favorite activities that make learning sight words fun. There is not a single worksheet and lots of these play based activities involve your child to be active. For kids aged 4-5 it's so important to keep learning fun and moving. Little ones are not meant to sit and do busy work; they learn by doing!