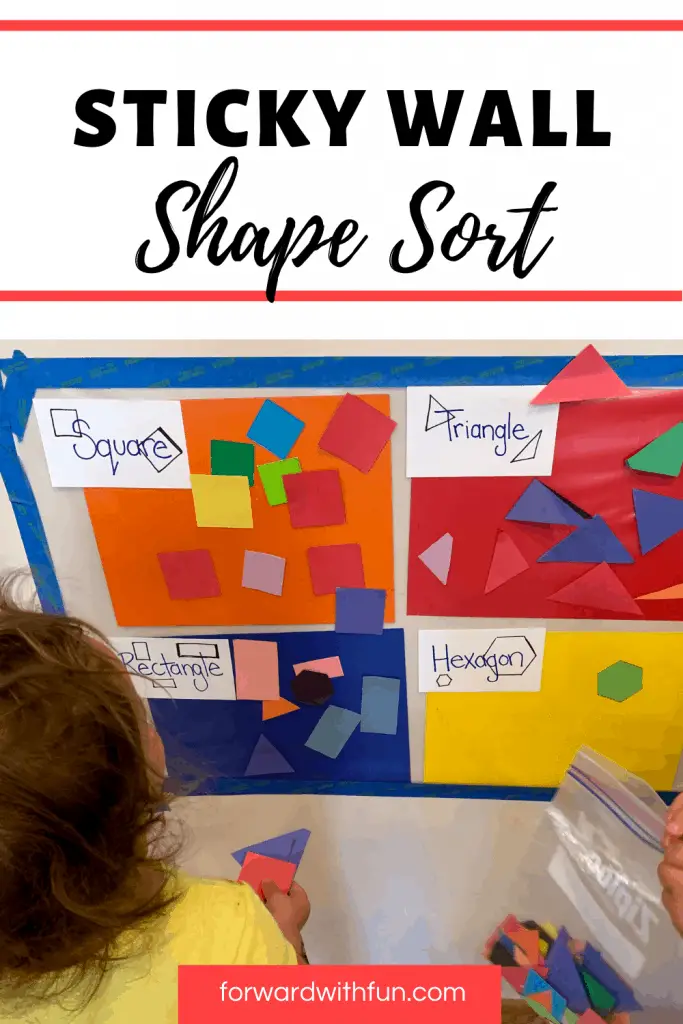
One of the best ways to practice shape identification is through sorting shapes. Using contact paper to make a sticky wall, you'll have the perfect shape sorting setup!
If you're wondering how to make a sticky wall, you'll want to watch the quick timelapse on this post: Sticky Wall Activities
Before you play, make sure you have sectioned off areas of your sticky wall for each shape. You can do this with tape or like in this photo below, by putting a differently colored paper behind the contact paper.
Then you'll need some shapes. I cut up pieces of construction paper in every which way to make shapes, but you can also use these helpful foam shape stickers, to make it easier to prep. Either label each area or put a different shape in each area so kids will know which shape goes where.
Kids are like sponges. When they're engrossed in a fun task like sorting shapes on the sticky wall, they can pick up a lot more information through guided questioning techniques. Here are some questions to use while they're sorting shapes to help your child think about shapes in different ways.

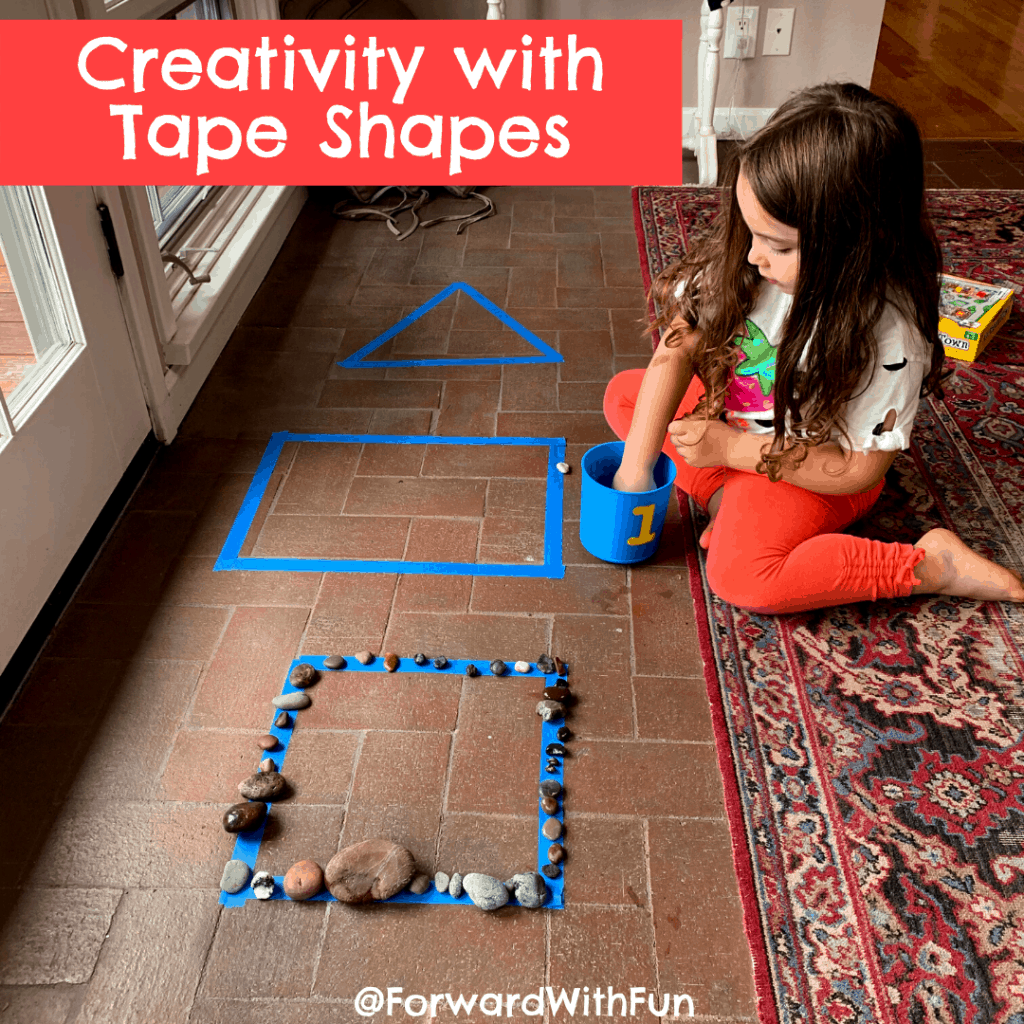
You won't wanna miss these tape shapes. Look around your home for items that match the shapes and put them inside the matching tape shapes.
For a low prep shape sort, you can download my shape sorting pdf! Kids will practice sorting triangles, squares, rectangles, and hexagons.
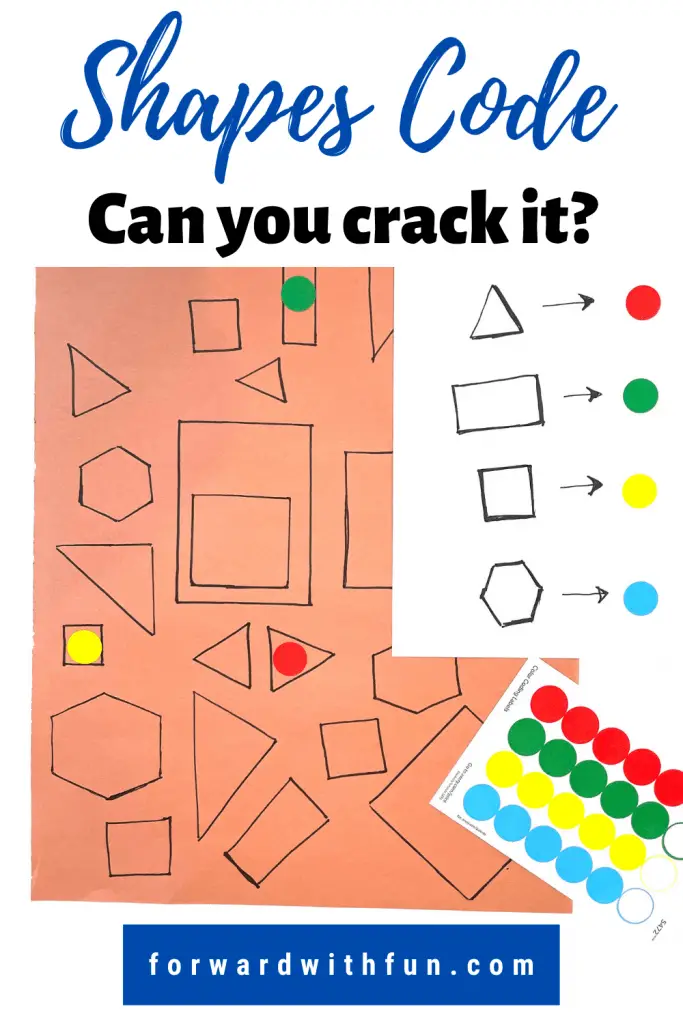
And this crack the code activity! Does this count as sorting? It's kinda backwards sorting as you crack the shape code!
Wow! This kindergarten teacher avoids all prep with an epic collage that has kids sorting shapes they see in magazines! Check out 2D shape sort from thekindergartensmorgasbord.com.
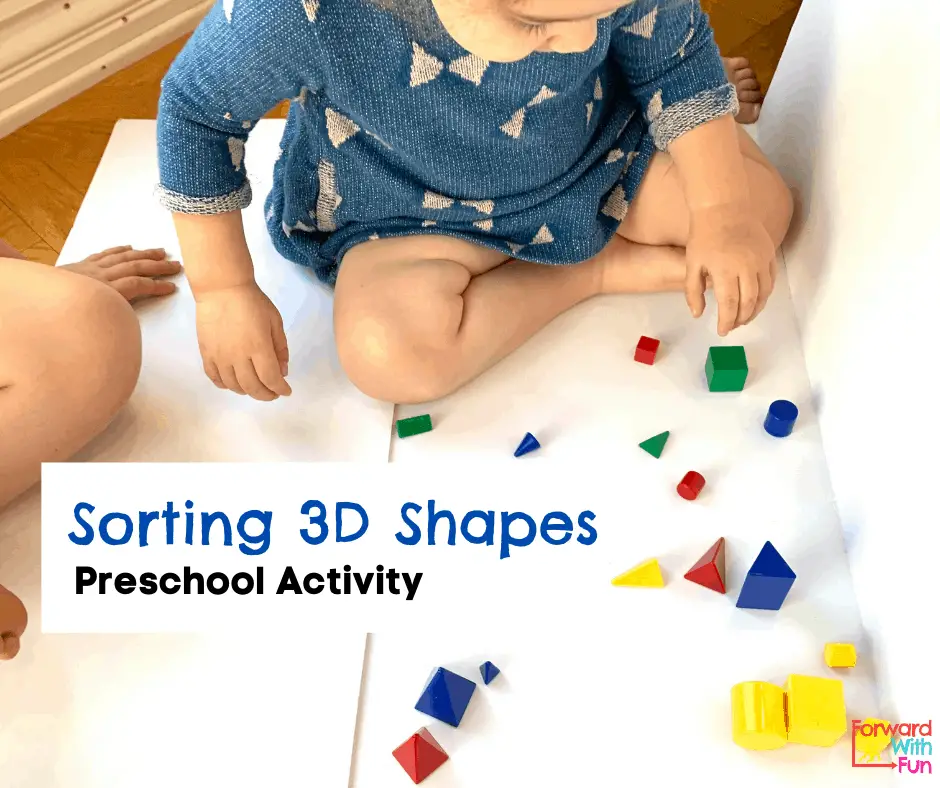
Finally, if you're looking into 3D shape activities, you won't wanna miss this shape sort and so much more!
A sticky wall is a fine motor platform for so many types of activities: art, building, sorting, and puzzling. It can include open ended activities or can have a prompt, and best of all it keeps kids busy while meeting their sensory and creativity needs.
Sticky walls are also sometimes known as sensory walls. Kids just love using their senses to touch and explore different materials as they put them on and take them off the wall.
*As an Amazon associate I may make a small commission from any purchases through my links at no additional cost to you.
Materials:
Blue Painters tape - safe for walls!
Contact paper for walls!
Can you use toilet paper rolls and other recyclable items to make a path for your pom poms?
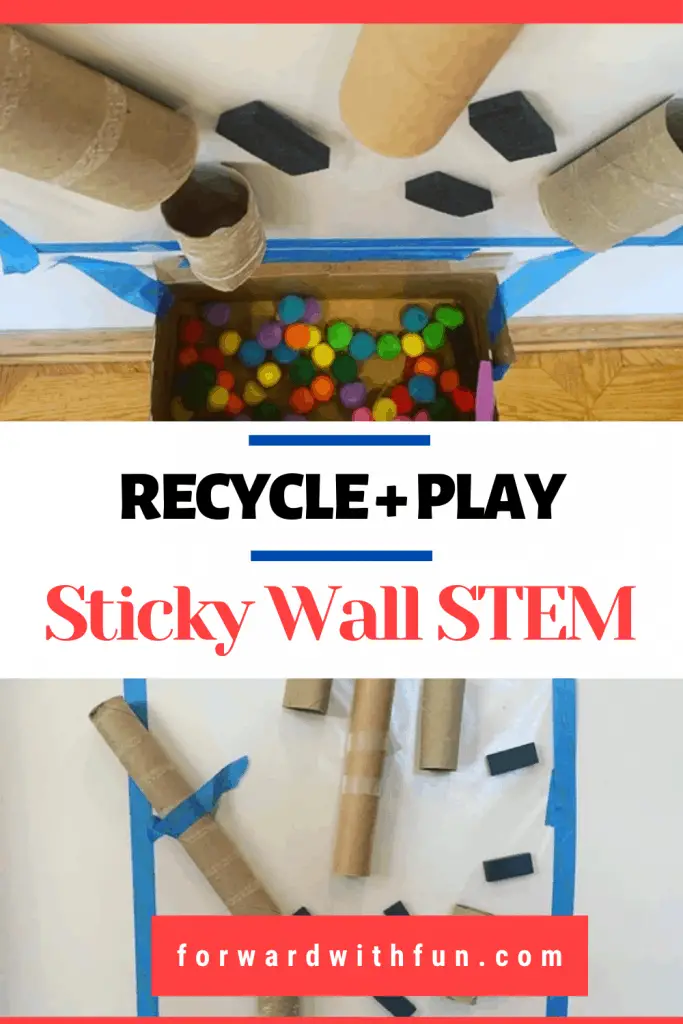
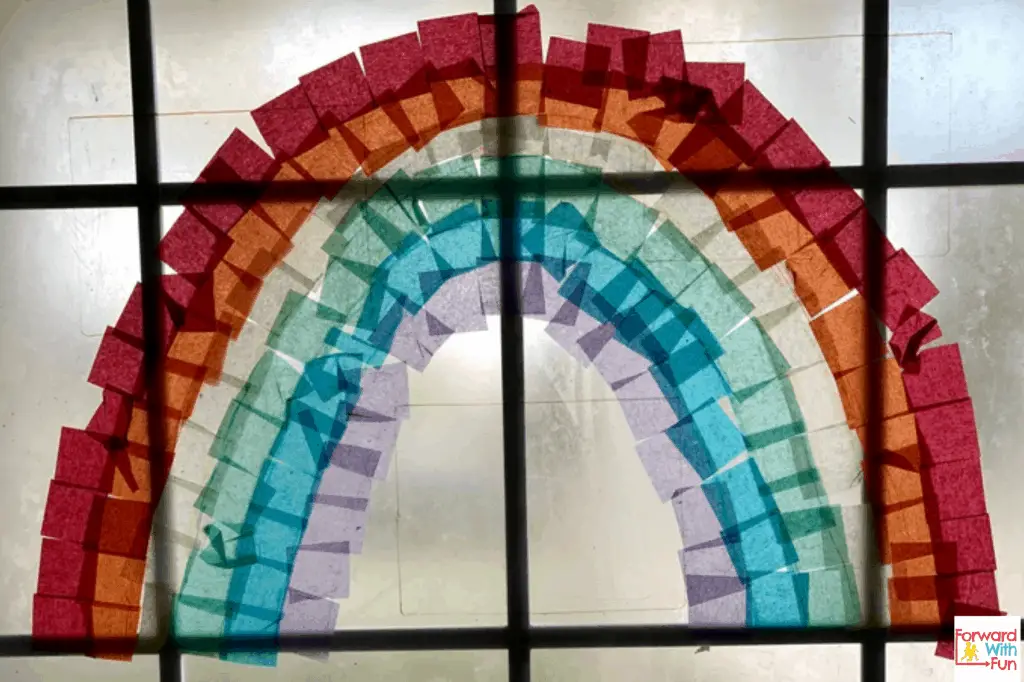
Place a coloring page with your child's favorite characters behind the contact paper and with tissue paper or construction paper, have them tear off sections to "color in" the character.

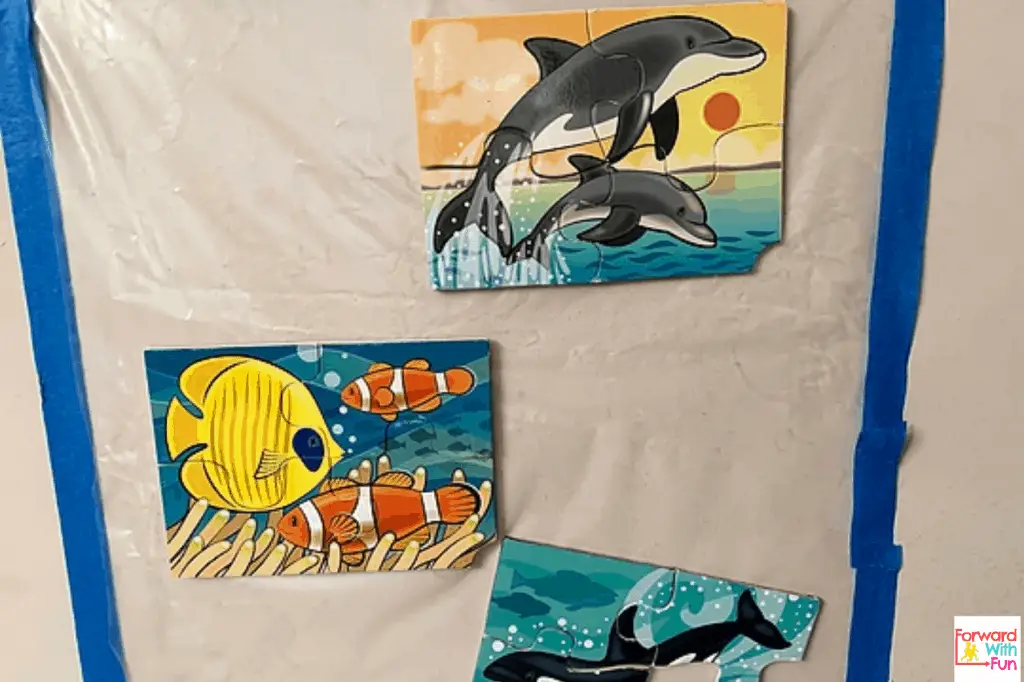
Match puzzle pieces together on the wall for a new way to use your puzzles!
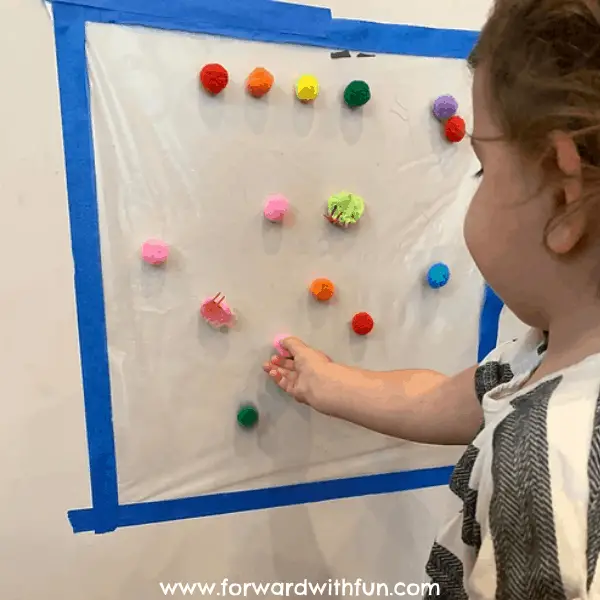
Toddlers love the soft feeling of pom poms as they place them on the sticky contact paper. This sensory wall combines sticky and soft textures for open ended play. Include language development by discussing the size and colors of the pom poms.
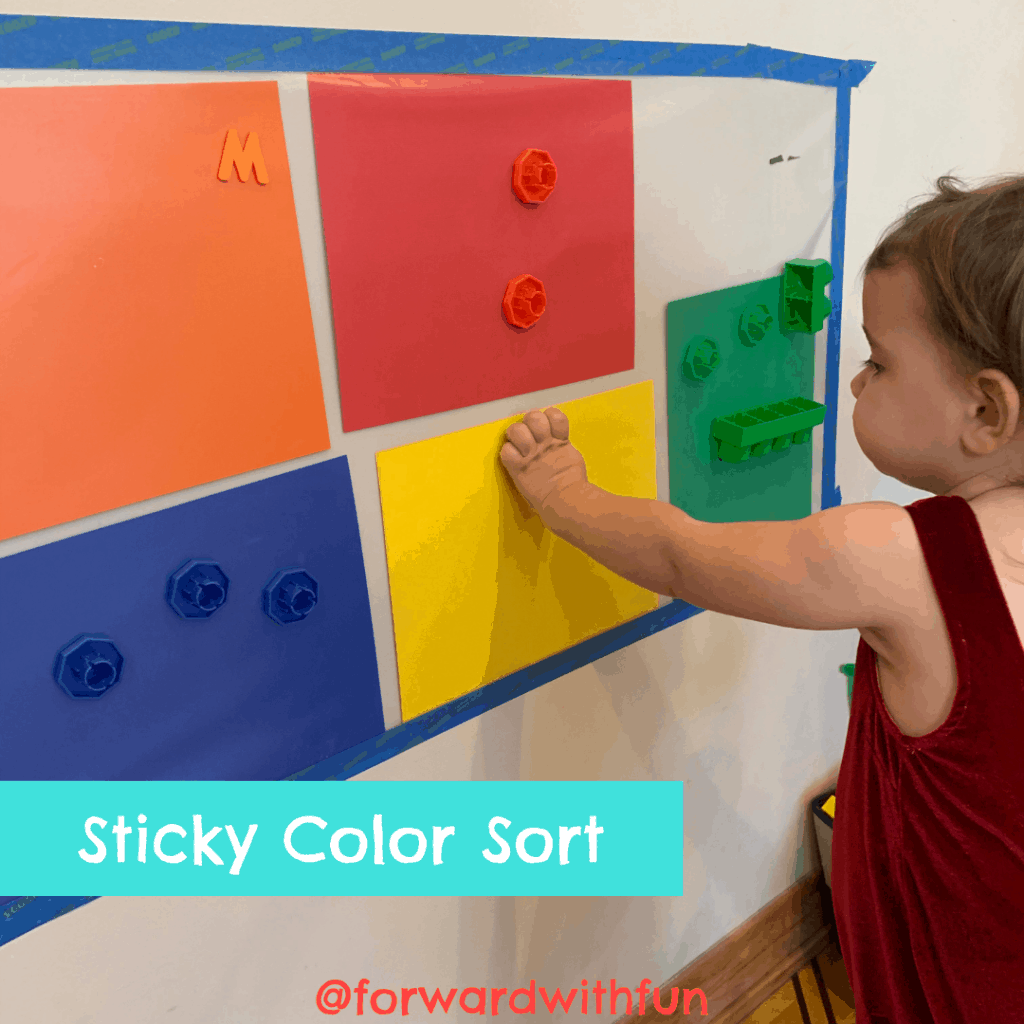
For the next two setups, you'll want to remove a small piece of the blue tape so you can place colored paper behind the contact paper. Then redo the blue tape...Now toddlers can sort items by color. Use flat, lightweight items to make sure they stick.
Section off the wall into areas for each shape. Cut out paper shapes or find shapes in your home. To get your free printout of shapes to sort visit this post.
Open ended and celebratory, definitely a favorite around here. This one is perfect for a special day. Blow up balloons and stick them as you please. Throw and see if you can get your sticky wall to "catch" your balloon.

Open ended- kids use letters to stick to the wall and make words. Kids can explore letter names, match uppercase and lowercase letters, etc.
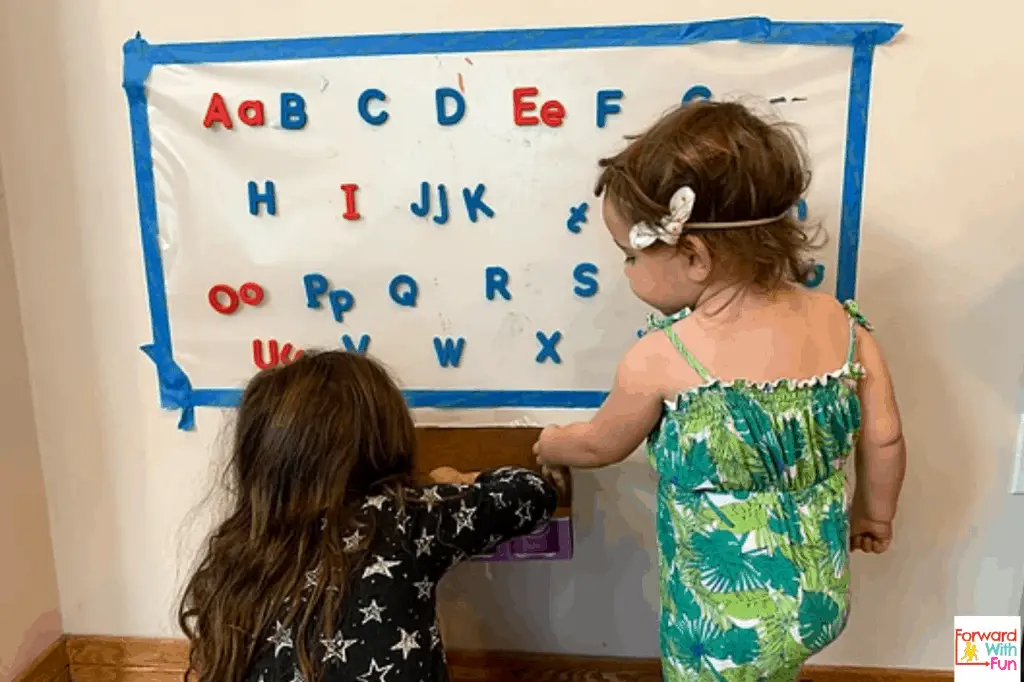
For more hands-on ways to learn about letters with toddlers and preschoolers, you'll wanna see these 12 Letter Games.
This activity comes from Happy Toddler Playtime, and is all about sorting coins! How fun!
This one is a little different, because I taped the contact paper into a cardboard frame so we could take it on our nature walk. You could also collect natural objects from a walk and then bring them home to put on the sticky wall you already have.
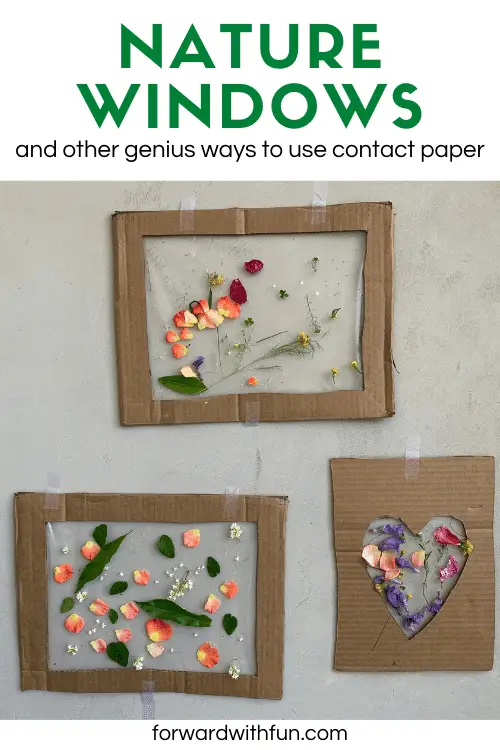
When your sticky wall begins to get slightly less sticky and it's time to switch it out, don't throw it away. Instead let your children decorate it with different kinds of paper (tissue paper, construction paper, cardboard, cut outs) and then remove it. To keep the art intact, place it sticky side against the wall for a beautiful decorative art piece.
Whether you have babies, preschoolers, or little kids, a sticky wall is a versatile, interactive activity you can have up all year long. These 11 sticky wall activities got me through COVID with a baby and a 4 year old-gosh I'm so glad those days are behind us! I hope they are just as fun for you!
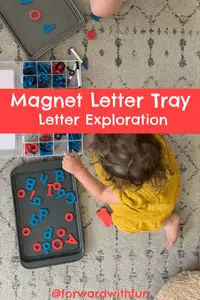
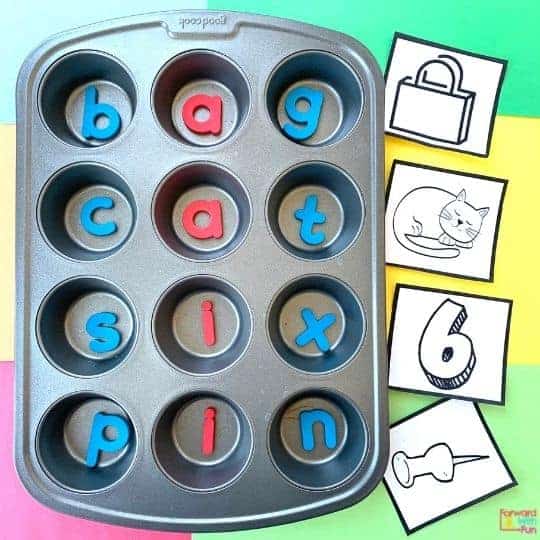
In a hands-on making words activity, kids will explore letters and work on phonemic awareness and phonics skills. Much better than a worksheet, grab a baking tray and some magnetic alphabet letters and find the right activity for your child's level below.
*As an Amazon Associate I may earn a small commission from qualifying purchases.

Using the BEST magnet letters from Coogam, we have created tons of reading games to learn letter names and teach letters together with their sounds.
This set of letters make much more visual sense for kids to work with than other multicolored magnet letters you usually see:
Also don't buy a fancy magnet board; you just need any old kitchen tray!

Before making words, comes the understanding the words are made up of letters and sounds. Exploring letters with or without sounds can be a great introduction to phonics.
My little one loves to explore with her magnet letters. She's 22 months and starting to show interest in learning letter names recently.
Lil Sis loves to pick out the same letters as Big Sis and repeat their names as she puts them on her tray. I am NOT of the mind that we need to teach kids letters this young, but if they pick it up on their own, what could be better?
Another learning opportunity with letter exploration is introducing each letter with its sound. As your child picks out a letter, you share the sound that letter makes, to start exposing them to the idea that letters make sounds.
Or if you are only learning the names of letters, kids can match lowercase and capital letters. If you want to target specific letters, limit the number of letters they're playing with. Too many new letters can cause visual overwhelm.
Part of learning to read and write is being able to isolate beginning, middle, and ending sounds of words.
Breaking up a word into all the sounds that compose it is called "segmenting." This hands on activity helps emerging readers isolate sounds and segment words.
Sound isolation and segmentation are part of an umbrella of skills that build phonemic awareness, which is essential for kids to have when learning to read.
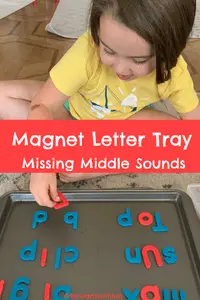
In this example I made mostly CVC (consonant vowel consonant) words that were missing their middle sound. Begin with beginning sounds, then work on ending sounds, and finally middle sounds as they're the most difficult.
During this making words activity, I read each word that was missing its middle letter to Big Sis. Then she would attempt to segment the word, isolate the middle sound, and find that letter to make the word complete.
It was great to have the Coogam letter magnets since she could easily focus on the red letters for this difficult task. It also was a natural way to bring up vowels and consonants and examples of each.
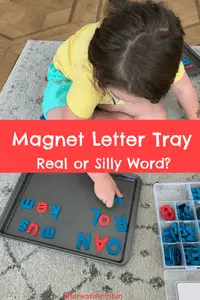
For a more abstract activity, I had Big Sis make her own words, only specifying that they need to all include at least one red letter (a vowel).
She decided she would place letters on the tray and then read them to see if she had created a real or a silly word.
Through this creative game she was matching letters with sounds, constructing words, reading words, and then using comprehension skills to determine if the word was real or silly.
Another way to play would be to say a word and have your kiddo spell it out phonetically on the tray. To be honest, I loved her creativity in making silly words and enjoyed hearing her sound them out more than my original idea!
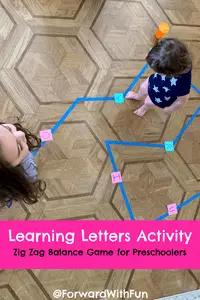
Learning through movement is a great way to get kids excited about learning the letters and sounds. Zig Zag Letter Balance is a two minute prep alphabet activity that kids totally love!
Both toddler and preschooler loved hopping, tip toeing, running, and dancing in this game so much they didn't even realize it was a learning game!
Learning through movement is also known as kinesthetic learning. This is one of a set of learning styles such as visual, auditory, verbal, logical, social and more.
Kids are knownto have a strong connection with kinesthetic learning! Got a kid who doesn't like worksheets but will play with their soccer ball or fly their plane in the air with great concentration? They might be a kinesthetic learner!
According to indeed.com, Kinesthetic learners retain information better when they can move their bodies and interact with their environments. Learning through movement has also been linked to greater self confidence and engagement while learning. That's all to say, it makes it so much more fun!
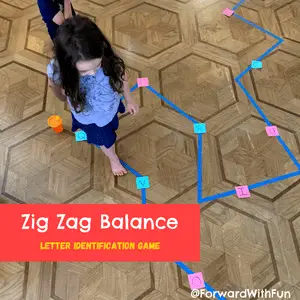
First grab some blue painters tape and pick a spot in your home or outside to create a zig zag line. Make sure to use painters tape to avoid ruining your floors! Create an kind of pathway with the tape.
Next, place Post-its along the path, and write the letters your child is learning on them. Stick to 5-10 letters for this game.
Ages 2-4: For kids just starting out with letters, this game can be solely a letter identification activity. You walk across the pathway and whenever you come to a letter, you say the name.
Ages 4-5: For preschoolers who have familiarity with letters and are working on sounds, they can name the letter and letter sound when they get to a letter.
For a challenge, kids can name a word that starts with that letter or even more challenging, spell a word that begins with that letter. That way they're working on beginning sound identification and spelling!
Ask your child what they notice about this zig zag line! Children may have a natural inclination that this will be a game about movement, letters, or both.
Invite your child to move across the line, but stop at all the letters. They can name the letter, name the letter sounds, or say a word that begins with that letter!
Think of all the different ways of moving across the line. Here are some ideas:
As kids think of more ways to revisit the balancing line, they're exposing themselves to the letters and practicing those names and letter sounds over and over again. The more exposure they have, the more it sticks!
To help your kid become an alphabet champion, check out these 13 Letter Learning games we LOVE.
Kinesthetic learning helps kids build new knowledge in ways they enjoy, and a secondary benefit to learning through movement is the improvement of gross motor skills.
Gross motor skills are any activity that uses the gross motor muscles that make large movements: arms, torso, and legs. Let's face it, kids are NOT the most coordinated bunch so developing these muscles through movement is essential and helpful. First5California.com has some helpful gross motor milestones to check out!
So often kids are seated for learning time, but my personal rule is that kids shouldn't sit for more minutes than twice their age. When we invite kids to play and move to learn, they jump for joy and learning becomes fun, not a task. How would you rather practice your letter sounds? Sitting in a desk or hopping, skipping, and jumping to new skills?
If you liked this learning through movement game, you'll definitely want to check out this gross motor sequencing activity!
This is the perfect sequencing activity to introduce your little learner to the reading comprehension skill of sequencing events.
As part of the kindergarten standards, children need to be able to retell a story including all major events.
"CCSS.ELA-LITERACY.RL.K.2
With prompting and support, retell familiar stories, including key details."
What comes first? Next? Then? and Last? Those are the sequencing words we use to support 5 year olds to tell the story.
Sequencing and retelling a story can be one of the most complicated things we ask children to do at this age, so by starting with this sequencing activity, we are creating a concrete and fun experience they can reference going forward.
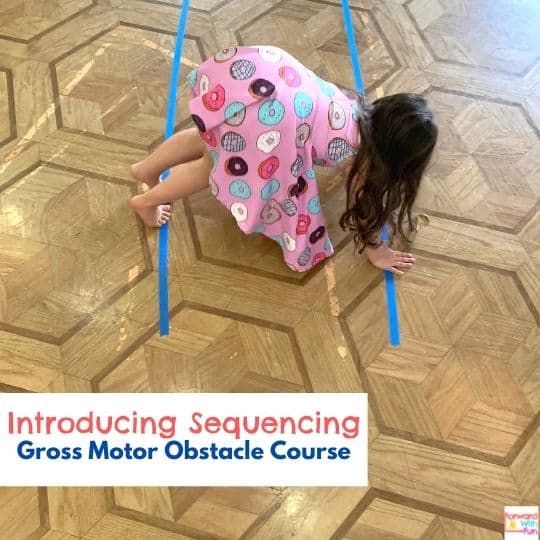

See the picture or make your own sequencing obstacle course.
Your child will be hitting the start button (Post-It), balancing across the line, jumping from tape to tape, crawling along the two lines, and finishing by hitting the end Post-it. You can also change up the movements for each section. We ended up making the rule that you had to keep both feet on the tape in order to get through the obstacle course correctly!
4. Have your child complete the sequencing activity as many times as they like. Then ask them to retell or sequence the steps of the obstacle course from start to finish. If they need help remembering the order, they can walk through the course as they sequence it.
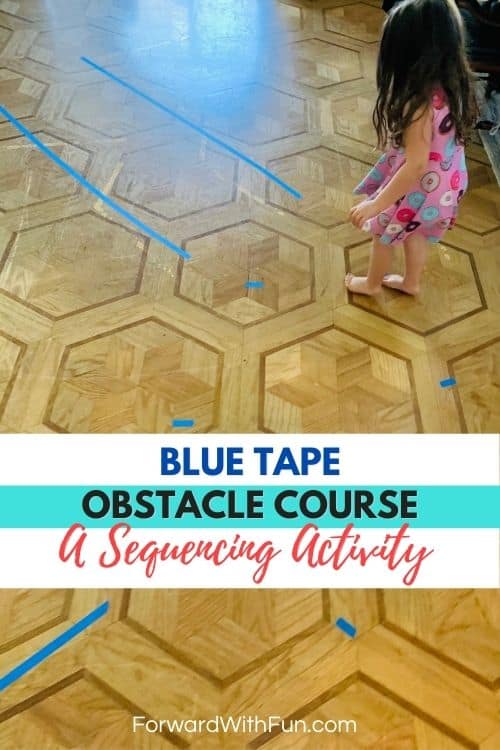
Sequencing can be a confusing skill for little ones but with a clear start and end, along with the blue tape visual of all the movements they did, your child will have greater success in retracing their steps.
The best part is it only took me 2 minutes to prep the whole thing, and we played it over and over again. Your little one can even teach others in the family how to do it, and explaining it to others will be another way they practice sequencing. Give it a try and you'll be working on reading comprehension without even knowing it.
Want a week full of free hands-on learning for kids who don't like to sit still? Join our mailing list and you'll get one free week of The Fun Club, our signature learning program for kids 4-5.
All I had on a trip to visit my in laws was some blue painters tape; so I created tape shapes to help my children practice names and attributes of shapes while having some fun!
I quickly taped up the floor and watched the ideas flow from their minds. Being bored can certainly bring out creativity, and I was so happy to see them go from begging for screen time to thinking creatively and getting active.
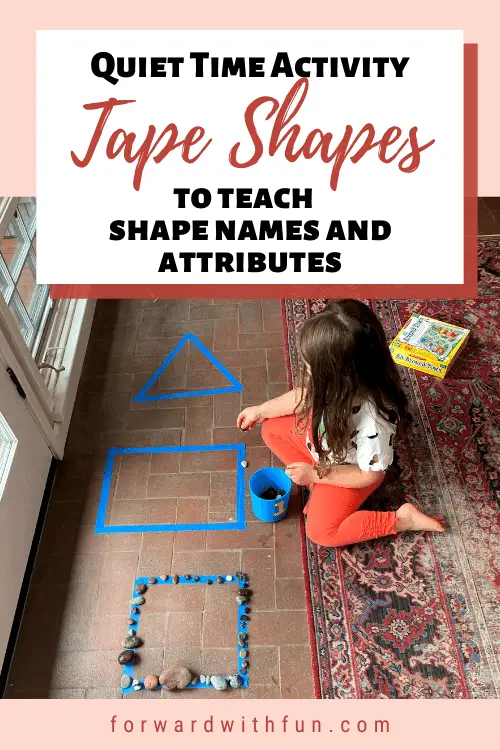
Earlier in the day, we had gone to a beautiful beach on the California coast and collected a mountain of colorful rocks.
With rocks as their newest obsession, the girls started organizing the small stones around the tape. This could be done with any kind of item: cars, pom poms, figures.
Lining up toys is a wonderful quiet time activity, and kids love looking at their collections in new ways. We revisited this one again during the baby's nap.
Never miss an opportunity to turn learning into a gross motor game! For my kids, learning is most fun when they're not sitting down.
With my older daughter (4.5 years at the time), I wanted to build knowledge of attributes of shapes. So, I called out descriptors and attributes for her to find and run/walk/jump to.
With Lil Sis (18 months), she's just being exposed to shapes, I called out names of shapes. She also loves the Sticky Wall Shape Sort.
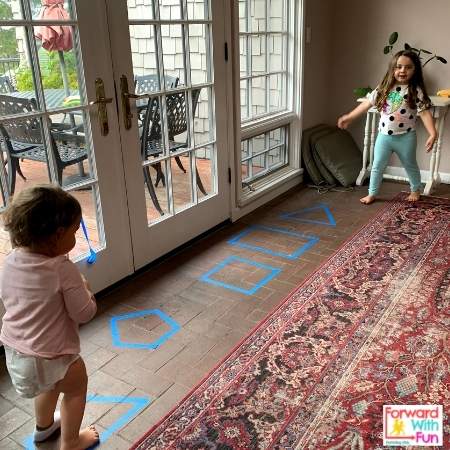
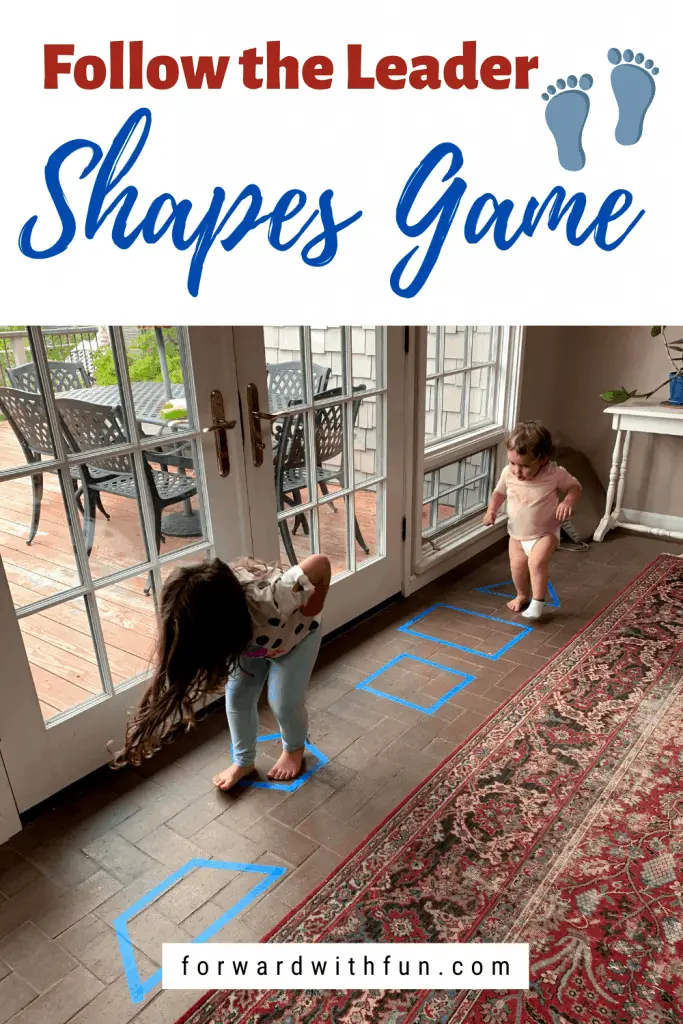
For a more independent game, the girls played a hopscotch adjacent game where they would run and jump through all the tape. They took turns leading who would be the leader and also tried out different kinds of movements. Some examples kids love: run, jump, hop on one foot, gallop, swim, etc.
Susie from Busytoddler.com uses tape shapes to sort household objects like blocks, books, balls, and more. As kids play they're comparing and contrasting the attributes of shapes as they sort.
Looking for even more ways to play with attributes of shapes? Check out these 3D Shapes activities that explore shape names, attributes, and comparing and contrasting 2D vs 3D shapes.
More hands-on learning, delivered to your email when you sign up for our newsletter below.
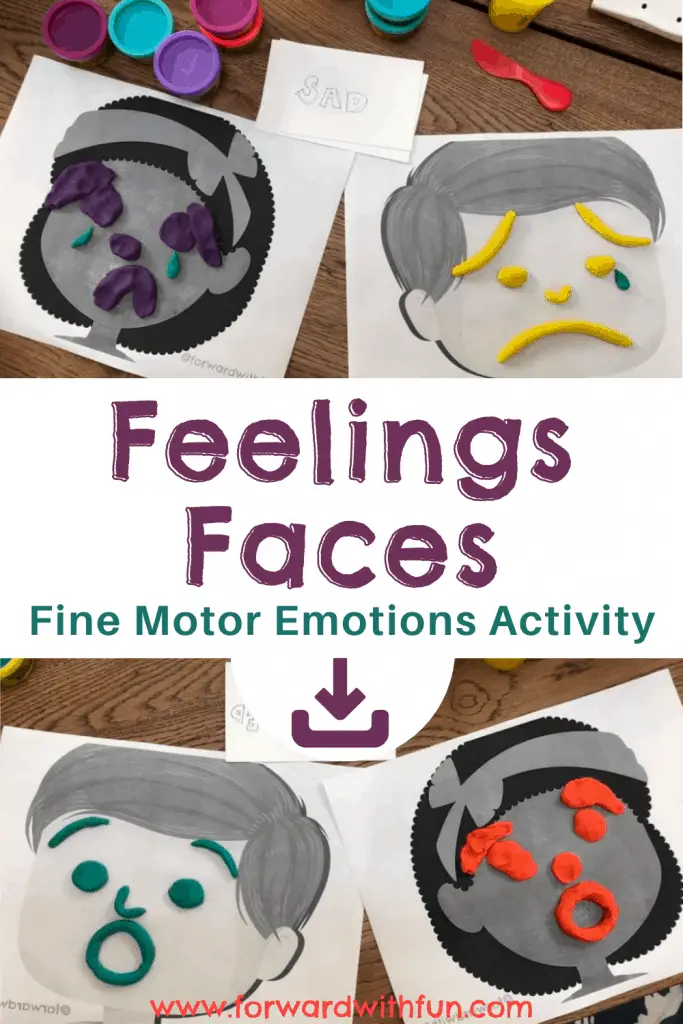
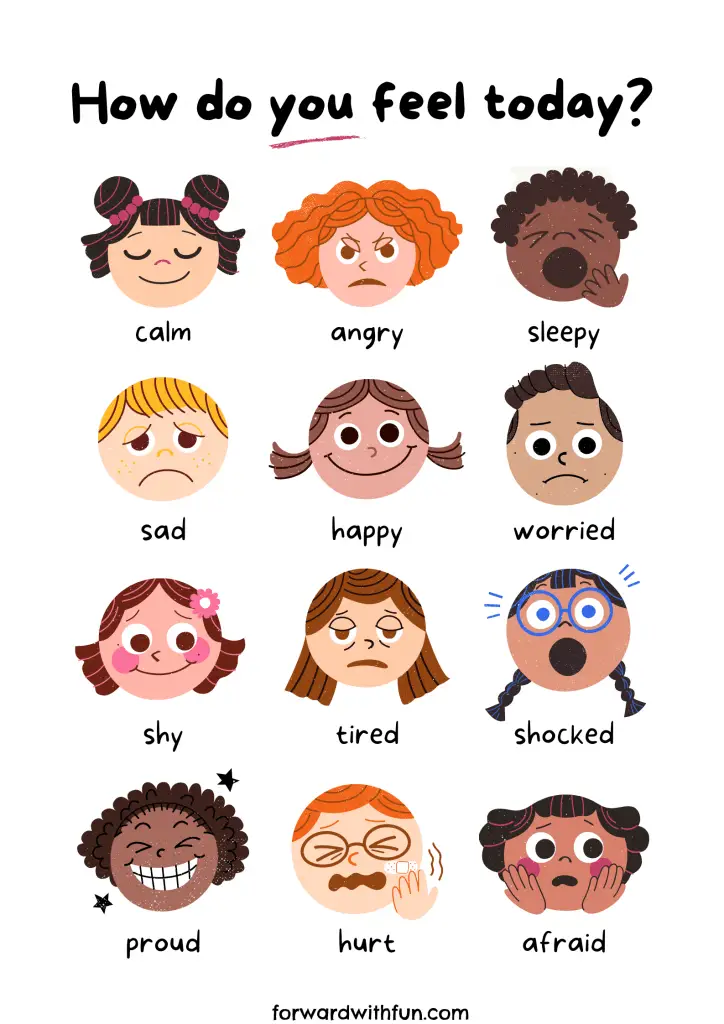
In this activity children will create feelings faces to explore different feelings to build their emotional intelligence... Did you know that including social emotional learning activities when teaching can lead to better academic performance?
For so long, schools focused only on teaching academics, but with more and more research, people are understanding the value in teaching the whole child. Social emotional learning helps kids understand themselves and others, leading to better quality relationships and interactions.
*As an Amazon Affiliate, I may get a small commission if you purchase from links in this post, at no additional cost to you.
The teacher who cultivates a classroom culture of caring makes students feel welcome, respected, and at home. As a result, in this kind of setting, students are best able to take risks, make mistakes, and learn. Their minds are more open to learning if their basic needs of feeling safe, relaxed, and cared for are met.
The Yale Center for Emotional Intelligence has created an effective and systematic way to teach kids about social and emotional intelligence.
Their acronym RULER stands for the 5 skills of emotional intelligence: Recognizing, Understanding, Labeling, Expressing and Regulating. To learn more about RULER you can visit their page: https://www.rulerapproach.org/about/what-is-ruler/
Parents can improve social emotional learning through the following ways:
The Feelings Faces activity will help children explore the first three parts of RULER: recognizing, understanding, and labeling.
You're going to need Feelings Faces Play Dough Mats for this activity.
Materials: Index cards, play dough, Feelings Faces Mats, and marker
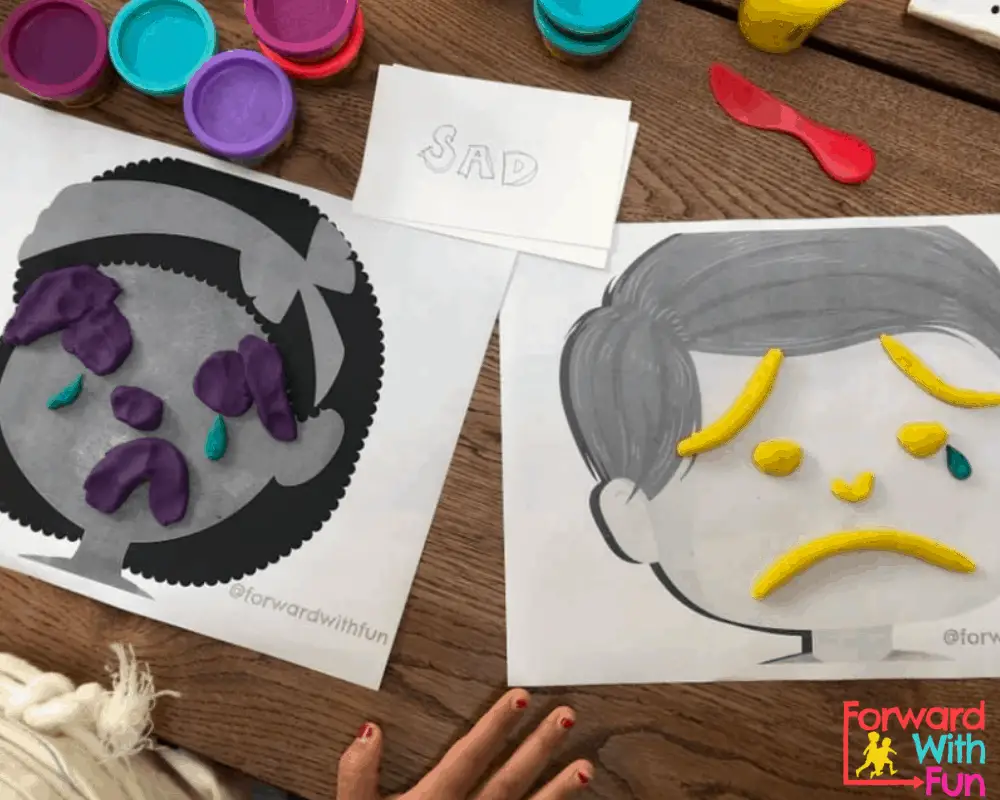
1. Start by asking for background knowledge on the topic. For example, ask, "What feelings do you know?" As your child lists off feelings they know, write them down on index cards. When you are done, have your child pick a card from the pile. (Want pre-made cards? Download them at the bottom!)
2. Together try to make faces of that feeling on the Play Dough Feelings Faces Mat. Discussion and guided questions:
3. If your child is unable to recreate a feeling on the mat, ask them to try to make the face of that feeling, or describe your face when expressing that feeling.
When we build feelings on the Feelings Faces Play Dough mats we are deepening our knowledge surrounding that feeling. Only once we understand the feeling and are able to discuss it, can we recognize it when it's "happening" to us and then regulate it, if needed.
Kids who understand their own feelings have more success recognizing and understanding emotions in other people which can help them have more positive interactions and build stronger relationships.
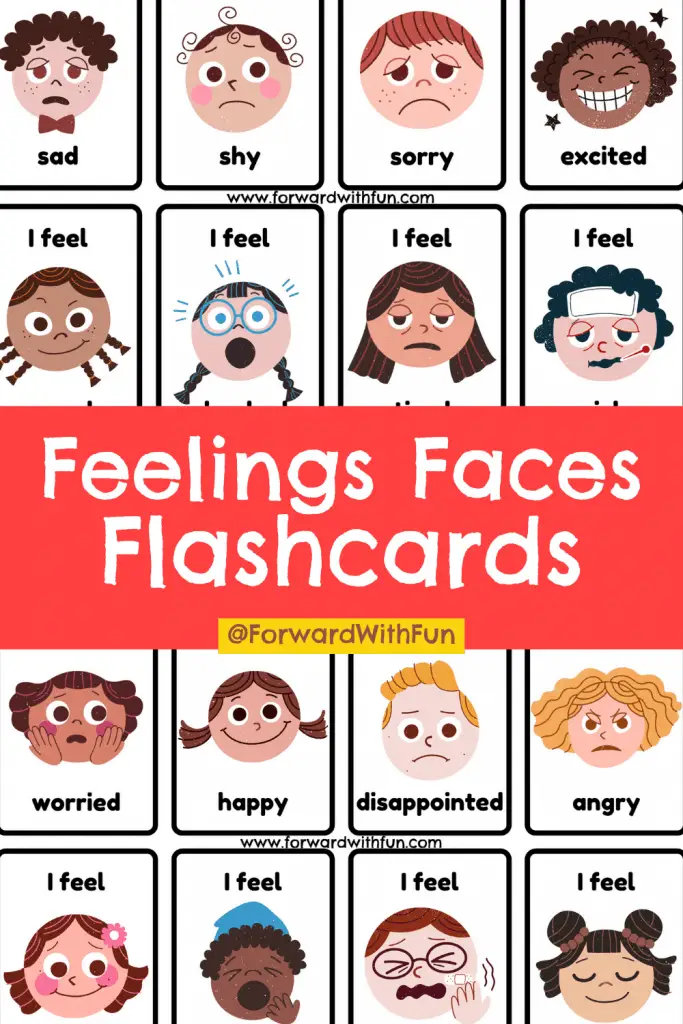
If your child is having difficulty understanding and labeling their feelings, or the feelings of others, you may want to print out this feelings faces chart. It may also come in handy during the activity to help them describe and create the features that go with each emotion.
These feelings faces flashcards can come in handy in a game of charades, making play-dough feelings faces, or even in a feelings memory matching game. For that last one make sure to print out 2 sets.
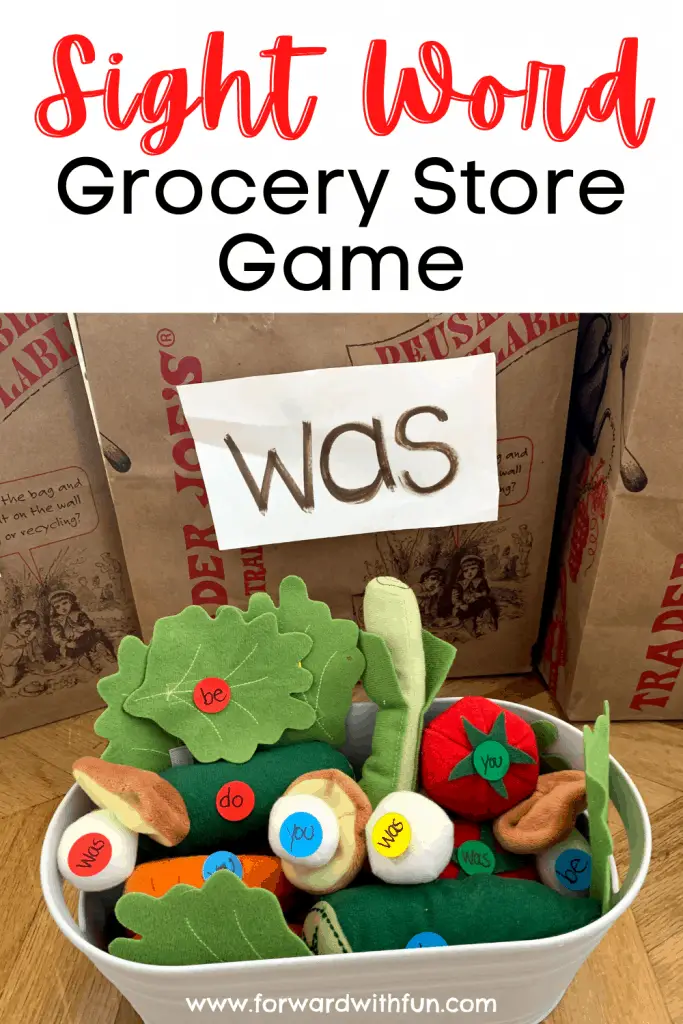
Imaginative play rolled into sight word sort activity: an unusually clever way to make what was once dull, suddenly burst with potential.
One thing my kids really missed from our Pre-Covid life is grocery shopping. I never knew how much I'd miss taking them to the grocery store and all the sweet interactions we would have as we walked around picking out what we needed (and yes, tantrums too).
Now I go to Trader Joe's (heaven?) once a week and when I come home, the kids are SO excited to look at what I got. They love to sort out the food items and learn what goes in the fridge, freezer, and pantry. Since groceries became so high interest for them, I created a grocery sorting sight words activity for them.
*As an Amazon affiliate, I may get a small commission for purchases made through links in this post.
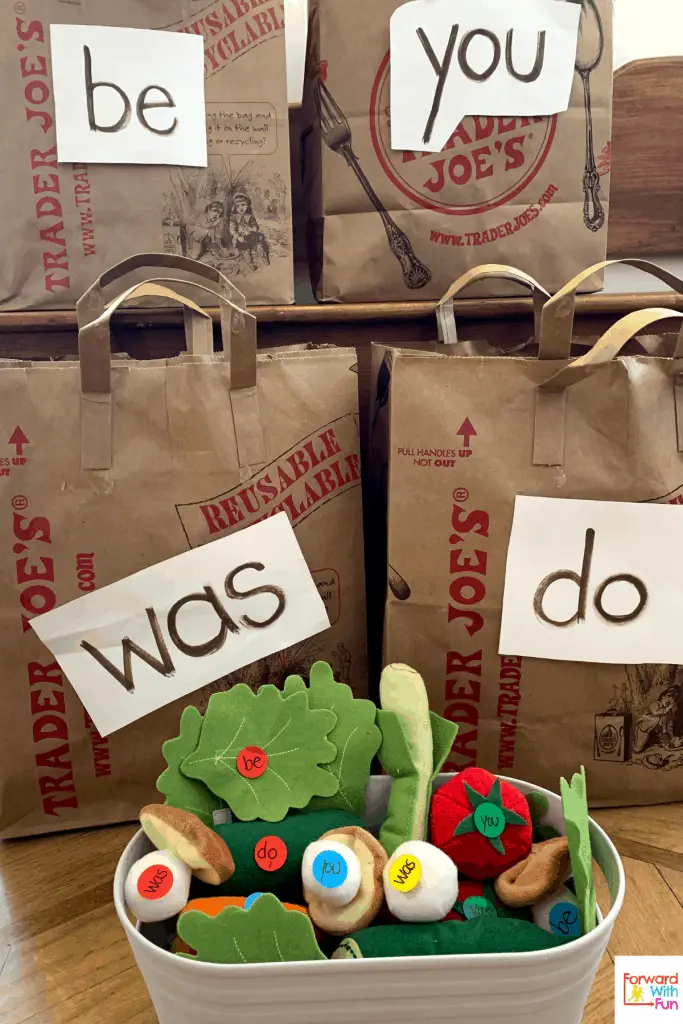
Pick 4-5 sight words your child is working on for this activity. Don't know which ones you should start with? Check out this list. Write them in big lettering on white paper and cut them out. Tape them onto your grocery bags.
Using dot stickers (we love these), write those same sight words multiple times on the sheet. Then peel off the stickers and place them on play food or real food before placing it in your grocery basket.
With my girls, I pretended I had done the shopping in the grocery store and had come to the checkout counter to pay.
Often the bagging clerk will separate the groceries into bags based on where they go: fridge, freezer, or pantry, but for our sight words sorting activity we would be reading each word and putting it in the matching sight word's bag.
This activity got some great sight words reading in as Big Sis sorted the sight words on the produce to the bag. It was also a great way to talk about real life skills, like grocery shopping.
Here are 16 of my favorite, highly engaging sight word activities perfect for kindergarten through second grade. You'll never need another sight words worksheet again.

Water beads lend themselves to that zen sensory play that keeps kids entertained and creative. This craft had my kids concentrating quietly as they learned about the rainbow of colors while practicing their pincer grip for some fine motor fun.
Create a beautiful recycled relaxation bottle with water beads for a craft that's packed with learning.
*As an Amazon affiliate, I may get a small commission for purchases made through links in this post.
Get your water beads ready in a super science experiment you can view HERE. As a reminder, always use supervision when playing with water beads as they are a choking hazard. Safety is the number one priority!

A rainbow Relaxation Bottle is made of water beads and recycled bottle.
Little Sis is still learning colors at just around 2 years old. As your child names and sorts each color they're building oral language skills as well as the beginning math skill of categorizing!
Big Sis knows her colors, but she is, like many 4 year olds, obsessed with rainbows. This was a great opportunity to teach her about ROYGBIV, red-orange-yellow-blue-indigo-violet, the order of rainbow colors.
We wrote down all the colors in the correct order, placing one of each color next to the word in case she couldn't read it on her own.
As I mentioned, sorting and categorizing colors is a beginning math skill, but there is a lot more math hiding in this project.

Rainbow Water Bead Crafts incorporate STEM
When you look at your craft bottle, in order to create the rainbow effect, you're going to have to put in even layers of each color.
Big Sis took on this problem to solve, by deciding that there should be about two layers of each color so that we could see each color clearly and it wouldn't mix up with the ones above and below.
For older children, they could measure their bottles and then divide by the number of colors then mark the bottles - a simple, hands-on way to introduce fractions or explain division.
Another way to ensure equal layers would be to count the balls in each layer and make sure to include the same number each time.
So many math concepts!
My husband laughs at how I hoard clear glass and plastic containers.
The reason is twofold. Firstly, I'm a crafter by nature. I can see the potential for creativity in almost anything, but secondly, I'm really working on lowering the amount of waste I make.
I have an incredible Zero-waste friend who has inspired me to reduce my carbon footprint by becoming more mindful about the trash my family and I create. I hope that as I change my habits that things like reusing objects instead of throwing them away, recycling, and composting become more natural to my kids, enough for them to become lifelong habits.
Anyway, the girls selected these from my "don't throw away" collection which brought up the topic of why I have that collection.
Even Lil Sis isn't too little for some earth friendly projects. We talked about how those items could be recycled but it would take a lot of energy and time to be converted but that if we used them the way they are, they would be turned into something beautiful that's also useful.
Another important environmental discussion was about how we use the water beads to make our craft safely!
The number one rule is that water beads stay in the tub and don't get thrown around the yard, but that if that happens, we sweep them up so that animals don't eat them and get sick. Keeping our earth healthy is our job!
During the crafting I asked the girls how they felt and they said calm. We tried to pinpoint what about the craft made them feel calm. Was it the water beads? Was it working with their hands? Was it the soothing colors or the diligent sorting and productive plunking of the beads into the bottle?
Big Sis was able to really articulate that she felt calm when she was working quietly with water beads. It also soothed her that we were sitting outside.
It's valuable information, because, I'll be honest after 4 months in quarantine, there are days when our house is anything BUT calm. So we discussed further..."Thank you for telling me how it makes you calm to create quietly. Do you think the next time you're feeling overwhelmed you might like to do another quiet project like this? Or maybe we could try a change of scenery since you like going outside?"
She said yes and then asked if we could add those strategies to her Calm Map.
The Calm Map is an activity I created in The Fun Club as part of our social-emotional curriculum. It's a literal map for the kids to refer to when they're feeling big feelings and want to calm down. Ours is displayed on the wall, and we added these ideas to it.
Want to know more about The Fun Club? Each week we do 5 hands-on simple but fun activities: 2 math, 2 literacy, and 1 social and emotional learning. Learn more by visiting www.forwardwithfun.com/the-fun-club.
I hope you enjoy this water beads craft as much as we did!